• Home
  • New? Start Here!
  • Holidays
  • Parties
  • Contact
  • Facebook
  • Twitter
  • Pinterest
  • Google+
  • Instagram

Creative Kid Snacks

make fun of lunch!

  • Breakfasts
  • Lunches
  • Dinner
  • Snacks
  • Desserts

End of the Rainbow Fruit Salad

March 17, 2014 by Amy Hudson

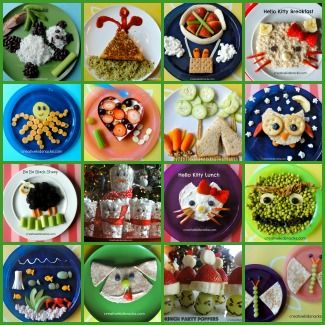
One of the primary goals I have as a mom is to teach my kids to love eating healthy food.  The reason we share our creative and healthy snacks here is to give parents plenty of ideas on how to present a healthy meal in a FUN way.

I also love sharing other resources that are out there so that you, dear reader, can have a great arsenal of tricks up your sleeve to encourage your kids along their journey of  nourishing their bodies by learning to make healthy food choices.  As kids get older, not only do they have more independence when it comes to preparing their own meals, they also develop more specific tastes.  Sometimes, kids can decide that they do not like something that they used to really enjoy eating.  It’s in situations like this that you need to pull out a secret tool for getting them to eat healthy.

Kitchen Club Kids has created a collection of story books that contain healthy recipes for kids.  The recipes are designed to be able to be prepared by kids of any age.  Each recipe is full of healthy ingredients like fruits and vegetables.  The objective is to create an experience for children in reading a fun story, planning a recipe out, making the recipe, and then enjoying a healthy snack!  Sounds like a total win to me!

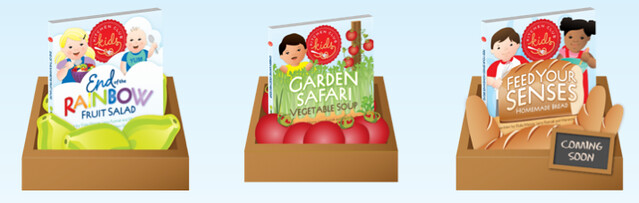
Kitchen Club Kids sent us the End of the Rainbow Fruit Salad book to try out share our thoughts with you.  Here was our experience:

The day the book arrived at our doorstep, the girls saw that it was a new book for them.  The colors and images immediately grabbed their attention.  Grace, (almost 6), read the story to herself and then to her younger sister.  She asked if we were going to make the fruit salad from the book that day.  I told her that we were going to do a special shopping trip first to collect the ingredients for the salad, and that she would be in charge of making the grocery list!  This was a great way to give her even more ownership of the experience.

Shopping for Ingredients

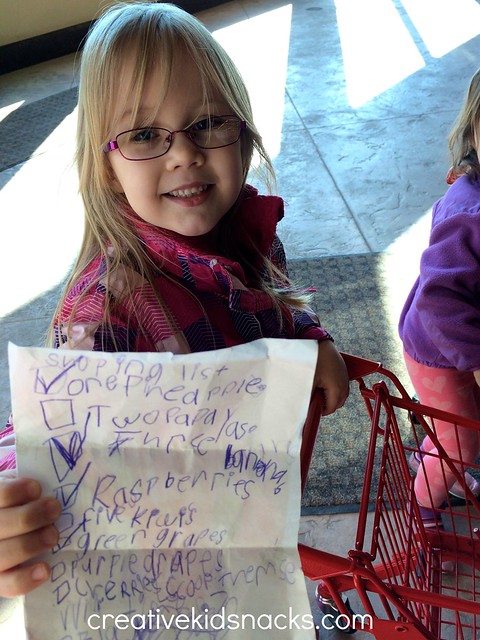
We took the list Grace had written up and went to our local grocery store.  The items that are checked off in the photo above are the items we had on hand already in the house.  She listed every ingredient in the recipe on her paper, then checked to see what we had and what we still needed.

The girls loved going shopping for their own ingredients to make their own special recipe.  I know that Grace felt just like her mommy here, because she has been on many grocery runs with me as I go through my own list.  Shopping was a fun and vital part of the fun of this recipe-making experience for us.

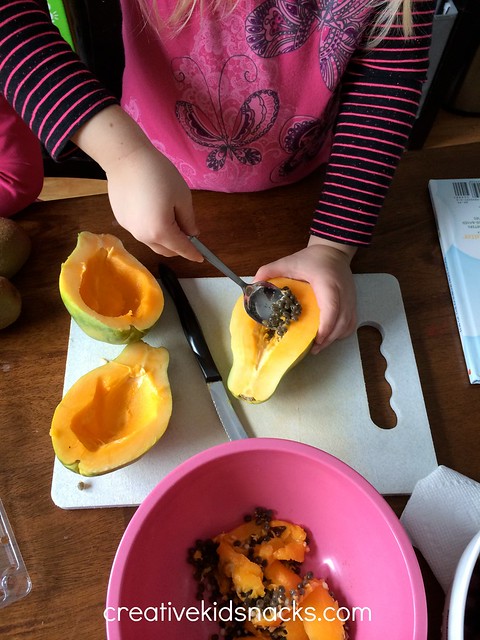
Preparing the Ingredients

Back at home, Grace read the story one more time as we collected each item needed for our fruit salad.  We made sure each item was on the table ready to go as it was mentioned in the book.


Making the Salad

We lined the ingredients up on the table from right to left in the order they appeared in the story.  I did the cutting and slicing, and they did the rest! 
One of the most interesting ingredients in this fruit salad recipe is papaya.  Do you know that, in all of my years of being crazy for fruits and veggies, I have never purchased papaya?  The girls were fascinated by the big, shiny black seeds inside.  They loved scooping them out on their own.  Papaya tastes AMAZING, by the way! 

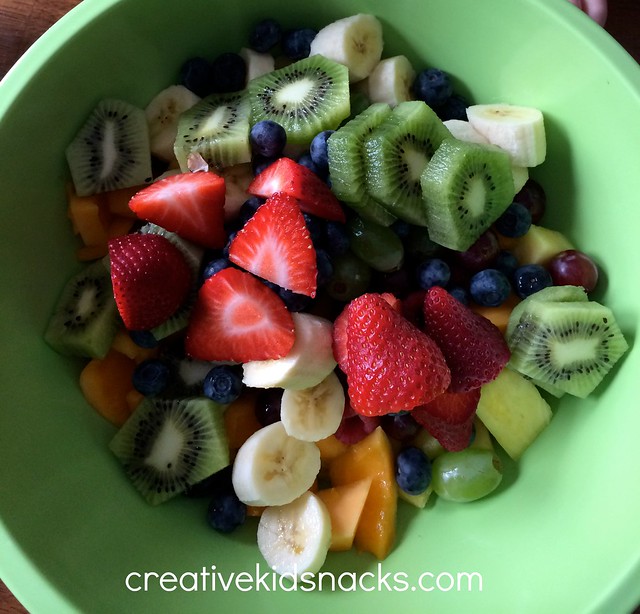
The combination of ingredients in this fruit salad recipe is absolutely delicious.  Some of the items in the recipe are not ones that I typically add to fruit salad, (like kiwi, papaya, and cherries), but I must say that the flavor combination is absolutely delicious!  The colors are beautiful too!  The kids could help me make this fruit salad again and again.  It would be fun to make it for a wedding or baby shower.

Time to Eat

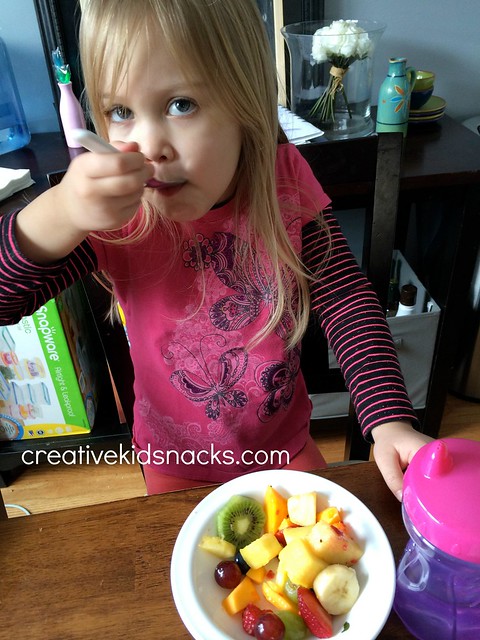
The girls and I LOVED this yummy salad.  Grace was thrilled to have completed this delicious project basically all by herself.

A Family Affair

I mentioned recently in one of my Instagram photos that I was struck by how fast time is going, and that some days I wish I could just hit the pause button.  As my girls grow up, I am realizing how important it is to “fill their love tank” each day by giving them some focused attention and really listening to how they feel.  An experience like this is a bonding opportunity as well as a time to create a beautiful, healthy dish we can be proud of.  Make sure you head over to Kitchen Club Kids to learn more about them, and maybe pick up a couple copies of their healthy recipe story books!

Filed Under: books

Ladybug Apples

November 25, 2013 by Amy Hudson

My oldest daughter checked out a great book at her school library recently.  It is a great book all about ladybugs.  The book goes into great detail about ladybugs’ life cycle, body structure, defense mechanisms, uses as natural pest repellants in agriculture, and much more.  I learned a lot after reading this book with her!  In honor of learning all about ladybugs, we decided to make a special treat to eat after lunch.

Ladybug Apples

Ingredients:

1 apple (we used Honeycrisp)

4-6 oz semi sweet chocolate chips

2 cheerios

Directions:

Slice the apple into two halves, just outside the core.  You will have two halves to make into little ladybugs.  Place chocolate chips into a small glass bowl and microwave for one minute, stirring with a rubber spatula at 20 second intervals.  Once chocolate is melted, spoon into a plastic zip baggie and slice a tiny corner off of the bag to use for piping the chocolate.  Pipe a “T” across the back of the ladybug’s back – one central line along the back, and one line to divide what will look like the back from what will look like  the head area.  Fill in the head with chocolate, drizzling it in with the piping bag, then smoothing with a knife, then add little dots around the rest of the back.  Add two cheerio eyes, repeat for the other ladybug, and chill for 10 minutes in the fridge.

Easy, fun, and delicious dessert to celebrate learning new things!  Enjoy!

If you liked these little guys, you may also want to check out our other animal creations.

(Sharing HERE)

Did you enjoy today’s snack?  Learn more about this blog here.


Filed Under: animals, apple, books, desserts, ladybug Tagged With: animals, apples, Books, desserts, ladybug, Snacks

Baa Baa Black Sheep

June 11, 2013 by Amy Hudson

Baa Baa, Black Sheep is a common nursery rhyme that first appeared in Tommy Thumb’s Pretty Song Book published in 1744!  This was a collection of English nursery rhymes, and Baa, Baa Black Sheep, along with Humpty Dumpty, Hey Diddle Diddle, Old King Cole, and more, have been beloved songs and verses chanted by many of us throughout the centuries.  When I became a mom, I made sure to have a copy of the classic nursery rhymes in my library for my own kids to learn and appreciate these little pieces of history.

My two children had the privilege of knowing most of their great grandparents for some of the early years of their life.  I always marveled at the way both great grandparent and great grandchild could recite their favorite nursery rhymes together and how great grandpa was taken back to his childhood as my children were experiencing theirs.

Baa Baa, Black Sheep

Creative Kid Snacks: Baa Baa Black Sheep

Ingredients:

handful of fresh blackberries

1 slice white cheese (mozzarella, provolone, swiss)

2 baby carrots

2 stalks celery

Directions:

Place blackberries in a large circle in the center of the plate.  Add a few extra blackberries where a head would be as you will use this area as a surface on which to lay the face.  Slice a large teardrop along with two small teardrop shapes out of the white cheese.  Place those on the head area to define the face and ears of your sheep.  Next, slice a baby carrot in half and then into 4 thin strips out of one of the halves.  Arrange the 4 strips of carrot below the sheep’s body to look like legs.  Take your knife and carefully slice a little smile out of your remaining half of a baby carrot.  Place the smile on the face.  Use two tiny blackberry fruit bits for eyes, and finish the look by adding small chunks of celery to look like the grass in which the sheep is grazing.

Nutritional Benefits of this Snack

Blackberries contain Vitamin C, Vitamin A, Vitamin E, Vitamin K, Manganese and fiber.  They are one of the top 10 antioxidant foods, known to contain polyphenols that helps reduce the risk of cancer and heart disease.  They also help to reduce inflammation.  Read more here.

Celery is a fantastic source of fiber, and it is said that a person burns more calories eating and digesting celery than the celery gives you.  It’s a “negative calorie” food!

Carrots contain beta carotene and lots of Vitamin A which helps with eyesight.  Nutrients in carrots are also linked to great skin, cleansing of the body, and lowered risk of stroke and heart disease.  See more here.

If you loved today’s snack, make sure you check out our other Book-Inspired plates along with our other Super Healthy Snacks!

(Sharing HERE)

Did you enjoy today’s snack?  Learn more about this blog here.


Filed Under: books, carrots, cheese, snacks Tagged With: Ba Ba Black Sheep, Books, nursery rhymes, nutrition, sheep, super healthy

Chicka Chicka Boom Boom

May 1, 2013 by Amy Hudson

Chicka Chicka Boom Boom is one of the most fun children’s books to read aloud!

Written by Bill Martin, Jr. and John Archambault, and illustrated by Lois Ehlert, the story is told of alphabet letters who mischievously climb a coconut tree and tumble down.  The rhythmic way it is written makes it fun to read with the kids, bouncing them on your knees all the while.

Chicka Chicka Boom Boom Lunch

Chicka Chicka Boom Boom Kids Lunch - ideas for reading the story and making a special lunch to go with it! | CreativeKidSnacks.com

We created this lunch using leftovers a combination of leftovers from this yummy meal made the night before and fresh ingredients.  Spoon rice (or an alternative listed below) onto the bottom portion of your plate as a ground.  Next, use fresh pineapple chunks to build a palm tree.  Slice an avocado and place sections above for the palm branches.  Slice a meatball in half and lay onto the plate to look like coconuts.  (Note: I microwaved the portion of the leftovers I was going to use before assembling this lunch).

Finally, using string cheese, add the letters of the alphabet heading towards the “coconut tree”.  You’re done!

Variations:

Ground: oatmeal, hummus, cheerios, black beans, (or any other beans), turkey, or basically anything brown or black!

Tree trunk: banana, mango, peaches

Palm leaves: sugar snap peas, kiwi, green grapes, green apple slices

Coconuts: cereal, crackers (like Ritz), red or dark grapes, even sliced baby carrot wheels or banana wheels

Letters: pipe yogurt onto plate to make letters, Alphabet cereal

Chicka Chicka Boom Boom Learning Activities

1) Act out the story using alphabet cards (use store-bought or make your own on index cards).

2) Dance to the story, make up moves to go along with different phrases in the book.

3) Put in order the alphabet letters: spread alphabet cards all over the floor (like the pile of letters in the story), and have your child put them back in order by lining them up on the floor.  (Make your own alphabet cards if you don’t have your own).

More Book-Inspired Snacks Ideas:

The Giving Tree by Shel Silverstein
How Rocket Learned to Read by Tad Hills
Brown Bear, Brown Bear, What Do You See? by Eric Carle
Lousy Rotten Stinkin’ Grapes by Margie Palatini
Blackout by John Rocco
A House for Hermit Crab by Eric Carle
The Very Hungry Caterpillar by Eric Carle

(Sharing HERE)

Did you enjoy today’s snack?  Learn more about this blog here.

Filed Under: avocado, books, cheese, Chicka Chika Boom Boom, leftovers, pineapple Tagged With: avocado, Books, Chika Chika Boom Boom, educational, leftovers, meatballs, pineapple

The Giving Tree

February 8, 2013 by Amy Hudson

The Giving Tree by Shel Silverstein is one of the most poingant books about the nature of sacrificial love that exist for children.  In light of Valentines Day, I thought a lunch inspired by The Giving Tree was in order.

Giving Tree 1

Creating The Giving Tree lunch

Ingredients used:

Frozen or canned peas – about 6 oz

2 oz meat (pulled pork, rotisserie chicken, lunch meat, etc)

1 strawberry

1 slice of white cheese

1 pretzel

Thaw some frozen peas or use some canned peas and heat in a small glass bowl in the microwave.  Next, take some meat – I used leftover pulled pork, which was beautiful for texture, but you could use lunch meat, rotisserie chicken, or even sandwich bread – and form the trunk.  Before placing the peas on the plate, heat the meat in the microwave, about 30 seconds.  Remove the plate, add the peas to the top, and you have a beautiful tree that looks like the Giving Tree from the story.

Next, create the little boy.  I sliced a strawberry in half and sliced into it to create the shoulder straps and shorts.  Next, I took a slice of mozzarella cheese and made his hands, legs, and head.  I added a tiny currant (small raisin) for his eye, and made his hair out of several pretzel bits.

givngtree 2

Talking about LOVE using The Giving Tree Story

The Giving Tree has lots of implications about what it means to love.  It is quite interesting to find out whether your child picks up on these themes as you read the story.  Following are some before, during, and after reading ideas.

Before reading:

Ask your child ways people can show others that they love them.  (They might give you ideas like hug, give a gift, say “I love you”, etc.)

Ask your child how they know that you love them.  What makes them feel loved?  (This will indicate your child’s “love language”)

During Reading:

After reading the lines, “and the tree was happy”, ask your child why the tree was happy.

After reading the lines, “and the tree was happy.  But not really”, as your child why the tree wasn’t really happy.

After reading:

Discuss which character in the story showed love better.  Why?

Talk about how you love your child no matter what happens.

Ask how the boy could have shown love to the tree.

Think of ways your child can show love to others today.

Giving Tree 1

Have a wonderful Valentines Day.  If you need some other ideas for this special day, check out our “Heart Warming” Oatmeal, Valentines Day Pancakes, Guess How Much I Love You?, Valentines Day Apples, and I Love You yogurt snack.

(Sharing at Kitchen Fun with my 3 Sons and Sun Scholars)

Filed Under: books, holidays, Valentines Day Tagged With: Books, Holidays, Shel Silverstein, The Giving Tree, Valentines Day

Guess How Much I Love You?

January 30, 2013 by Amy Hudson

Guess How Much I Love You by Sam McBratney is one of my girls’ favorite books.  With a simple message about the great measure of the father and son bunny’s love for one another, it is a perfect Valentines Day read.  The story ends with the father bunny saying to the baby bunny, “I love you to the moon and back”.

Take a few minutes and read the story while snuggling with your child, then make this lunch.

howmuchlove 3

To make the rabbits, I used some turkey folded up into small squares for their faces.  I added ears using raw almonds, and used chocolate sprinkles (I know, I was lazy) for the eyes.

Next, I sliced several strawberries in half and cut a small “v” out of the center to look like a heart.  I laid them on the plate to look like they were ascending and descending from the moon.

I sliced a banana into a small crescent shape to use for the moon, and finally used some greek yogurt to create the stars, the arrow going to the moon and back, and the bottom portion of the bunnies’ faces.

Below is the super easy technique I used.

Scissor Method

I love using yogurt, especially Greek yogurt, for decorating a plate and creating a great design that would be hard to do using just food.

howmuchiloveyou 2

Of course, you can make this same snack out of anything you wish!  If you have a bunny shaped cookie cutter, you could easily make the two rabbits out of a sandwich.  You could also make the arrows using thin strips of banana if you don’t want to use the yogurt.  The moon could be made out of pineapple, cheese, or a yellow pepper.

Use your imagination!

HowmuchIloveyou 1

Check out our other Valentines Day and Love inspired snacks!  You’ll LOVE them . . .  I promise!

Valentines Day Apples

I love you breakfast

(Sharing HERE)

Filed Under: almonds, banana, books, strawberries, turkey, Valentines Day, yogurt Tagged With: Guess How Much I Love You, healthy snack, super healthy, Valentines Day

Grinch Party Poppers

December 4, 2012 by Amy Hudson

The Grinch is one of Dr. Suess’ most beloved characters, and at Christmas we love to watch “How the Grinch Stole Christmas”.
Just like we love to make Christmas trees, wreathes, snowmen, Santa, and reindeer for snacks this time of the year, we also love Mr. Grinch.

Today’s snack is a perfect finger food to put out for the kids at a Christmas party.
These would also be perfect for a Christmastime sleepover, featuring popcorn, the Grinch movie, and these scrumptious little poppers.
Healthy, cute, and super fun, you know these little guys will be a hit.
Here’s how to make them.

Step 1: Collect your ingredients and assemble Grinches

 
(Depending on how many Grinch poppers you would like to make, you will need that many of the following):
 
-slice of white string cheese (at least 1/3 inch thick)
-strawberry
-banana slice (at least 1/3 inch thick)
-green grape (with bottom sliced off so it lays flat)
-melted chocolate. (1/2 of a Hershey’s bar, broken into pieces and microwaved until melted, stirring at 20 second intervals will be plenty to make up to 25 poppers)
 
Assemble each Grinch by sliding each piece up a plastic toothpick.  I get mine from the dollar store.  They come in a package of assorted colors with little hearts on the top.  They are the perfect size, and not too sharp for the kids to eat off of.
 

 Step 2: Melt Chocolate

 
 Depending on how many poppers you are making, melt the appropriate amount of chocolate.  I used a simple Hershey bar in this recipe.

1/2 of a Hershey’s bar, broken into pieces and microwaved until melted, stirring at 20 second intervals will be plenty to make up to 25 poppers.

  Step 3: Pipe Grinch faces

Place your melted chocolate into a piping bag with a very small tip attachment; 
or do it the easy way by using a ziploc bag with a tiny snip off of one corner to pipe your faces.
Make 2 eyes with frowning eyebrows above them.  Next, make a wide smile with bumps and a little point at the bottom middle.

Step 4:  Chill, serve, and enjoy!

 
Chill in the refridgerator for at least 15 minutes.
 

 My little girls LOVED these guys.  I made about 10 of them for today’s post, and they had to be cut off after 4 each!  (They still hadn’t had their lunch yet)!
 
TIP: Pipe Grinch faces onto grapes and chill in advance if you want to work ahead and prevent the rest of the ingredients from being out in the air too long.
 
(Sharing HERE)
 
Follow us on Facebook / Pinterest
 

Filed Under: banana, books, cheese, christmas, desserts, holidays, movies, Party food, popular snacks, snacks, strawberries Tagged With: banana, Books, cheese, Christmas, desserts, Dr. Seuss, Grinch Party Poppers, Holidays, movies, Party Food, Snacks, Strawberries

ABC Lunch

November 12, 2012 by Amy Hudson

Is your child learning the ABC’s?  How about their vowels?  Today I have a lunch for you that is inspired by a story and that is perfect for teaching the ABC’s, practicing vowels, and spelling.

Slice a banana into 21 sections, and then find something else, like celery or perhaps apples or graham crackers, to use for your vowels.  Next, find a plastic bag, snip off a tiny piece of the corner, and fill with several tablespoons of peanut butter.

Before piping the letters onto each space, work the peanut butter around in the bag using your fingers until it softens a bit.  It will come out much easier that way.
Before eating, here are a few things you can do with your child:
a. Sing the alphabet song, of course!
b.  Ask him to point to the first letter in his name.
c.  Ask her to spell her name by pointing to each letter.
d.  Ask him which letter makes the sound __(fill in the blank)___.
e.  Point out the vowels and explain that there is a vowel in every English word.  (“Y” is also used as a vowel in certain cases)
f. Sing the “I like to eat apples and bananas” song to practice your vowel sounds.
g.  Use your imagination.
Now, read and play!
Screen shot 2013-01-22 at 2.05.44 PM
How Rocket Learned to Read is an adorable book about a dog who meets a little bird who happens to be teaching a class right in his favorite napping spot.  Rocket and the bird meet up every day, and the bird teaches Rocket his letters, reads him stories, and inspires him to love learning.  When winter comes, the bird flies south for the winter, leaving Rocket to practice his letters and wait for the bird to return.  They develop a beautiful friendship, and Rocket finally learns to read.
PLAY.
Take a few moments and practice your letter sounds with those magnetic letters that most of us have on the fridge.  Right now, my daughter is at the beginning stages of reading and knows her letter sounds well.
Use a simple word like “cat”, and practice moving new letters in front of the “at” and ask your child to sound out the new word.  Since they will be so similar to each other, it will be fun for your child to successfully read so many words in a row.
Try the same thing with different word endings, or by moving vowels in and out of the middle of simple words.
Kids will love this tasty alphabet snack!
(Sharing HERE)

Filed Under: ABC's, banana, books, celery, learning activity, peanut butter Tagged With: ABC’s, banana, Books, Celery, peanut butter, teaching and learning

Brown Bear, Brown Bear, What Do You See?

October 21, 2012 by Amy Hudson

Today’s post features Eric Carle’s beloved Brown Bear, Brown Bear What do you see? story book as well as a learning activity and snack to go with it!
This comes from a series I been calling Read.Play.Eat.  Take a look at the snacks and learning activities I shared for the following children’s books:
Blackout
It Could Always Be Worse
Lousy Rotten Stinkin’ Grapes

READ.

By Eric Carle
This is a story I’ll bet almost all of us have in our libraries!  I remember hearing this book read to me in kindergarten.
Read this story to you child.  Allow them to “fill in the blanks” as you pause when each new page comes.  They will quickly learn to name each new animal as it shows up.
PLAY.
Make some simple animals using a sharpie and some white cardstock.  I simply drew freehand from what I saw in the book.
Go through the story, and have your child color each animal as they appear.
Next, make some “puzzle pieces” by cutting the animals in half.
The goal will be to match each animal’s front to its back.
It will be all the easier with the colors each animal has.
Your child will be delighted to do a puzzle that he or she made themselves.
Another activity to do once the animals have all been matched together is to line them up in order of appearance in the story.
First, see if your child can do it from memory, then “check your answers” by using the book.  If they made mistakes, have them re-arrange the order to learn the right way.
So much fun!
EAT.
Create the Brown Bear of “Brown Bear, Brown Bear” by simply making a peanut butter sandwich, and slicing four legs.  The natural shape of the bread is very close to the shape of the bear in the illustrations in the book.
Next, cut a circle from another piece of bread.  Use two half raisins for the eyes, and some halved almonds for his ears and nose as shown.  So easy!

Filed Under: almonds, animals, bear, books, lunches, peanut butter sandwich, raisin Tagged With: almonds, animals, bear, Books, Lunches, peanut butter sandwich, raisin

Lion King Lunch

October 15, 2012 by Amy Hudson

“The Lion King” is one of my personal favorite Disney movies of all time.  We just got a copy for Christmas and the songs “Circle of Life” and “Can you feel the love tonight” are stuck in my head for hours every time we watch it!  Simba and Mufasa are the heroes of the story, so today are creating a lion lunch in their honor.
Create grown-up Simba or Mufasa with some rotini pasta with marinara sauce for the mane, a slice of colby jack cheese for his face, and, strawberries cut in a triangle for his nose and two thin strips for his mouth area!  Add two raisins for his eyes, and you are done.
Serve with some grapes on the side, and enjoy!
Check out our other Disney inspired lunches: Mickey, Mike Wazowski from Monsters Inc., Up, and Winnie the Pooh

(Linking up HERE)


Filed Under: animals, books, cheese, Disney, lion, nature, pasta, strawberries Tagged With: animals, Books, cheese, Disney, lion, nature, pasta, Strawberries

Next Page »

I'm Amy. One of my passions is serving my two little girls healthy, wholesome food in unexpected ways. Lunch time has become a time of learning, imagining, and bonding for us as we use great food to create little works of art... Read More…

facebooktwitterpinterest instagram google+

Tags

animals Apple avocado banana Biblical Birthday Parties blueberries Books Breakfasts carrots Celery cheese Christmas cottage cheese desserts Disney Easter educational Eggs everyday scenes grapes ham history Holidays Lunches movies nature Oatmeal Party Food peanut butter peanut butter sandwich raisin Raspberries Snacks snowman Sports Strawberries super healthy teaching and learning turkey TV shows Valentines Day Weekly Kids Co-op Winter yogurt

Best of

Best Of

Copyright Note

Please feel free to use any of these ideas with your children at home, school, church, or anywhere you are inspired to make fun of lunch. If you would like to share a post on a blog or site, you may use one picture so long as you include a link to the original post. Please do not re-post the whole article or distribute printed-out content without written permission from the original author.

Grab our button!

Creative Kid Snacks Button

© Copyright Creative Kid Snacks · Design & Development by 4th & Market