• Home
  • New? Start Here!
  • Holidays
  • Parties
  • Contact
  • Facebook
  • Twitter
  • Pinterest
  • Google+
  • Instagram

Creative Kid Snacks

make fun of lunch!

  • Breakfasts
  • Lunches
  • Dinner
  • Snacks
  • Desserts

3 kings

December 20, 2013 by Amy Hudson

The 3 kings, or reyes magos as I used to teach about in Spanish class, are an integral part of the Christmas story.  As we celebrate this special time, mixed with all of the fun holiday food we make are those snacks that remind us of the true meaning of Christmas.

Matthew 2: 1 – 12 tells the story of the Magi, or wise men from the east who came to worship Jesus because they saw the star of Bethlehem shining in the sky.
After Jesus was born in Bethlehem in Judea, during the time of King Herod, Magi from the east came to Jerusalem 2 and asked, “Where is the one who has been born king of the Jews? We saw his star when it rose and have come to worship him.”
3 When King Herod heard this he was disturbed, and all Jerusalem with him. 4 When he had called together all the people’s chief priests and teachers of the law, he asked them where the Messiah was to be born. 5 “In Bethlehem in Judea,” they replied, “for this is what the prophet has written:
6 “‘But you, Bethlehem, in the land of Judah,
are by no means least among the rulers of Judah;
for out of you will come a ruler
who will shepherd my people Israel.’”
7 Then Herod called the Magi secretly and found out from them the exact time the star had appeared. 8 He sent them to Bethlehem and said, “Go and search carefully for the child. As soon as you find him, report to me, so that I too may go and worship him.”
9 After they had heard the king, they went on their way, and the star they had seen when it rose went ahead of them until it stopped over the place where the child was. 10 When they saw the star, they were overjoyed. 11 On coming to the house, they saw the child with his mother Mary, and they bowed down and worshiped him. Then they opened their treasures and presented him with gifts of gold, frankincense and myrrh. 12 And having been warned in a dream not to go back to Herod, they returned to their country by another route.
The 3 magi, or 3 kings as they became popularly known, traveled and offered their gifts to baby Jesus.  It is believed that their being called kings is due to Psalms 72:11, “May all kings fall down before him”.
I’ve always been a huge fan of the images that portray this story with a scene that focuses on the starry sky and the men in the forefront of the image as sillouettes.  Here is an example.
(via)
Once I found out that the animal crackers I bought from Target contained camels,  I knew I had to make this snack!
To make the 3 kings snack, I started by placing the camels onto the plate.  Next, I took some deli ham and rolled it into three small triangular shapes to look like the men’s robes.  Next, I took one baby carrot and sliced the round edges off lengthwise so it would lay flat, and cut it into a square for the head.  (I made the head square in order for the crown to look like it lays flat).  Lastly, I cut a slice of cheddar cheese for the large star and the crowns.  It took some patience to slice the little sections out of the top of the slice (for the points on the crowns), but the end result made it all worth it!
Oh, and the stars were made by this trusty method that I love to use:


(Sharing HERE)


Filed Under: 3 wise men, cheese, christmas, yogurt Tagged With: 3 wise men, Biblical, cheese, Christmas, yogurt

Learning about Cells

May 14, 2013 by Amy Hudson

I remember learning about cells when I was in 7th grade.  For extra credit, I made a cell cake.  My mom helped me decorate a round cake and create all of the cell components on top using different colored icing and piping instruments.

The cake turned out so well that my teacher decided to place it in a display case in a prominent area of the school.  I laugh thinking back at that because the cake sat in there for so long that it started to decompose, and we were never able to eat any of that delicious cell cake!

Aside from earning me those extra credit points, that cake helped me to remember and love learning about the cell.

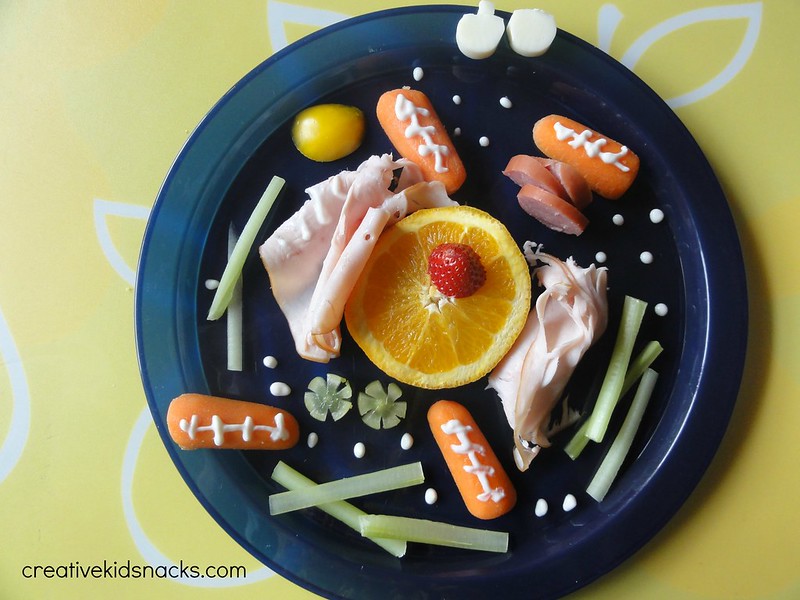
Today’s snack is a healthy version of that same experience, and it could be done in a science classroom as a test on the parts of a cell, or at home as part of a home school curriculum.  You could also make it for your younger kids just to teach them about the cell and how it all works, like we did!

Make a cell out of healthy foods from the fridge - great for a science lesson for home schoolers, science classroooms, or simple reinforcement at home when your student learns about cells.

As I was creating this snack for my 5 year-old, I pulled up this great site which gives clear explanations of each part of the cell, along with easy-to-understand drawings and diagrams.  I modeled today’s plate after this diagram on the site:

Click photo to be taken to source

Cells have lots of different components, and can be made using just about anything you have on hand in the kitchen.   Since we were going for a healthy snack today, here is the list of ingredients we used:

Ingredients

celery (1 stalk)

turkey breast (2 slices)

yellow pepper

strawberry (1 small slice)

orange (1 slice)

carrots (2)

green grapes (1)

yogurt (1 tablespoon)

hot dog slices (3 thin slices)

string cheese (2-3 small slices)
Make a cell out of healthy foods from the fridge - great for a science lesson for home schoolers, science classroooms, or simple reinforcement at home when your student learns about cells.

Create your cell by arranging each element on the plate as shown.

The carrots are sliced in half so that they lay flat on the plate.

To create the shape of the centrioles (green grapes), slice a green grape into wheels, then slice tiny triangles out of the edges.

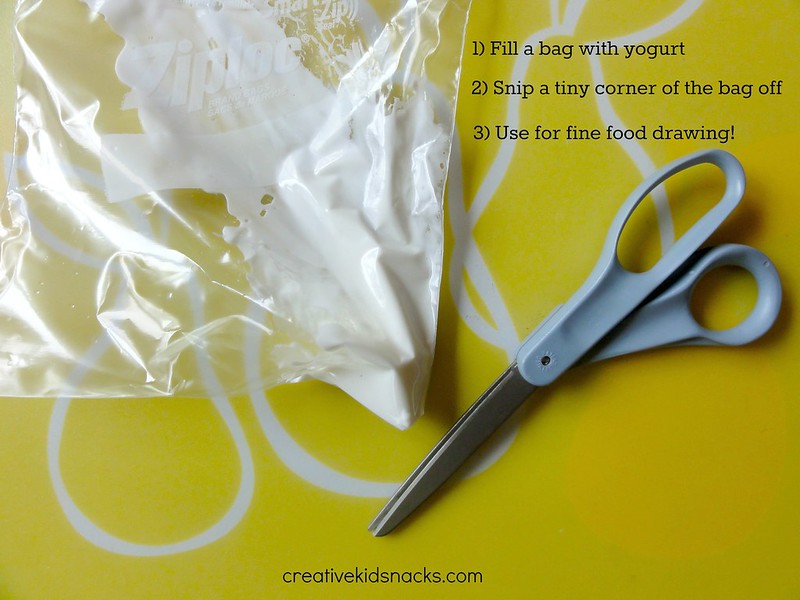
The ribosomes (yogurt) are made using the following technique (which we absolutely love!):
The finished product:
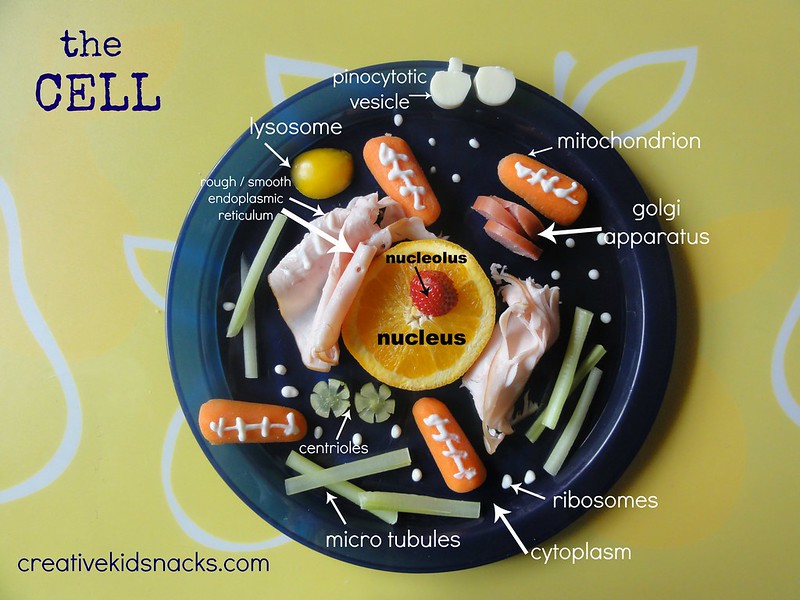
Make a cell out of healthy foods from the fridge - great for a science lesson for home schoolers, science classroooms, or simple reinforcement at home when your student learns about cells.

How to use this snack / activity

Challenge your (older) student to create a cell at home for a snack using some of the ingredients pictured here.  Your student can see if he can name each part of the cell and what its function is when he is done.

Teach your younger children about the human body using this snack.  You could draw the different parts on index cards, and write the function of the part on the back.  Your children can pick up one card at a time to learn what that part of the cell does.  They can even eat that part as you explain what its job is.

Science teachers could use this as an assessment activity.  Provide foods such as those pictured here, and assign students to create a plate of the animal cell, and be prepared to explain what each part is and its function.

Use resources like this to dig deeper and learn even more together with your child!

More Science Related Snacks

Solar System

Volcano

Under the Sea ecosystem

(Sharing HERE)

Did you enjoy today’s snack?  Learn more about this blog here.


Filed Under: cells, snacks Tagged With: Celery, cells, educational, grapes, orange, Science, Strawberries, super healthy, teaching and learning, turkey, Weekly Kid, Weekly Kid's Co-op, yogurt

Finding Nemo Snack

May 6, 2013 by Amy Hudson

Finding Nemo is one of Disney’s most beloved movies.  Even my two year old, who is scared of some of the other Disney movies at her age, likes Finding Nemo (although she does hold her sister’s hand during the shark part when we watch it at home).  We love all of the characters, including Dory, Marlin, Squirt, Crush, Mr. Ray, and, of course, Nemo.
Finding Nemo Snack

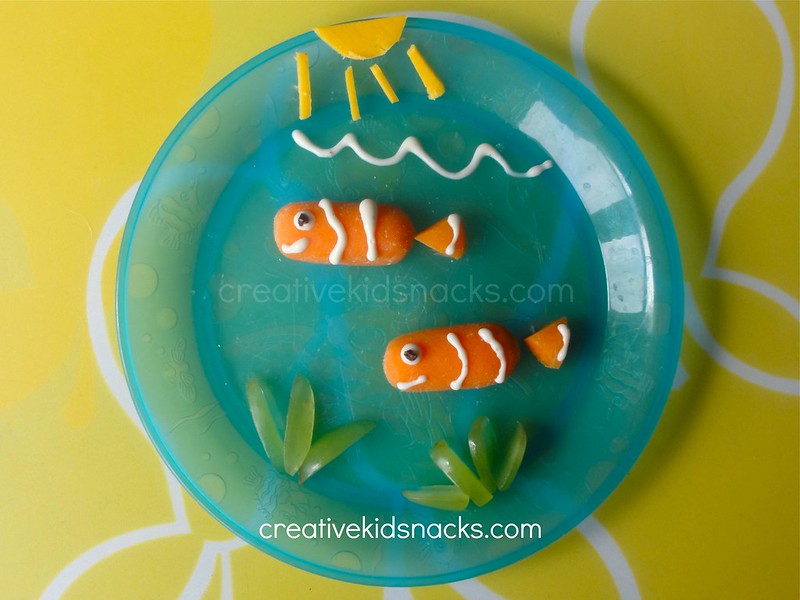
Finding Nemo: an adorable kid snack featuing Nemo and Marlin.  Visit CreativeKidSnacks.com for full directions as well as other Disney snacks!

Ingredients:

2 baby carrots

1 green grape

1 slice of cheddar cheese

1 T of yogurt (plain, Greek, etc.)

1 raisin or currant

Slice a baby carrot in half lengthwise, and lay each half on the plate.  This will be Marlin and Nemo’s bodies.  Take another baby carrot, slice in half lengthwise, and slice two triangles out of one of the halves.  Place these triangles onto the back of each body for tails.  Next, spoon a tablespoon of yogurt (I love to use plain Greek yogurt here, it’s got the most protein, and it’s actually better that it’s not sweetened, because it’s being served atop a carrot!).  Snip a tiny corner off of the bag, and pipe yogurt onto the fish’s bodies, making two stripes on the body, one on the tail, then an eye and a smile for each fish.  Finish the look by using the remainder of the yogurt to pipe little waves across the top of the plate to look like the fish are under water.

Slice a green grape in half lengthwise.  Next, slice each half into thin sections, and arrange on the plate to look like sea plants.  So simple, yet so adorable!

More Fun and Healthy Disney Snacks

Check out the other Disney snacks we’ve made.  Making your child’s favorite Disney characters using healthy foods is a great way to delight them as they eat, and encourage them to gobble up all of that healthy stuff you’ve used to make them!  Here are some examples:
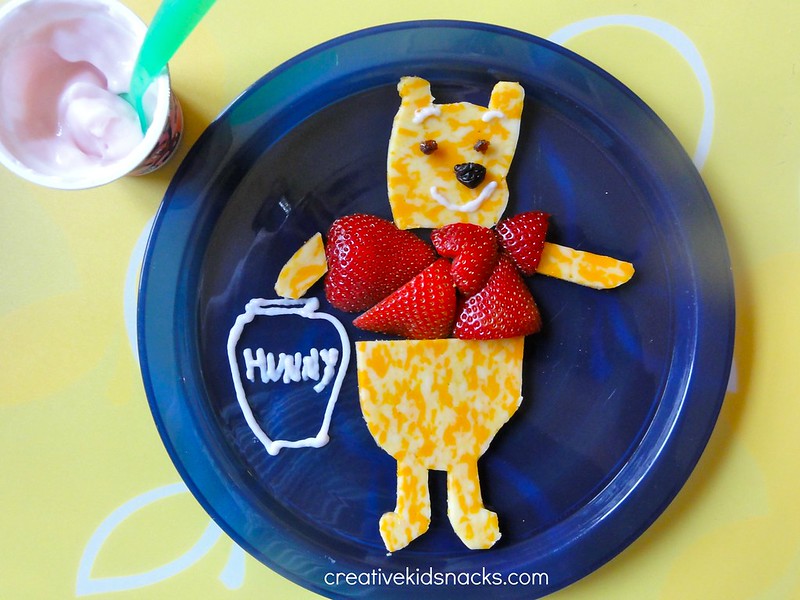
Winnie the Pooh by CreativeKidSnacks.comWinnie the Pooh


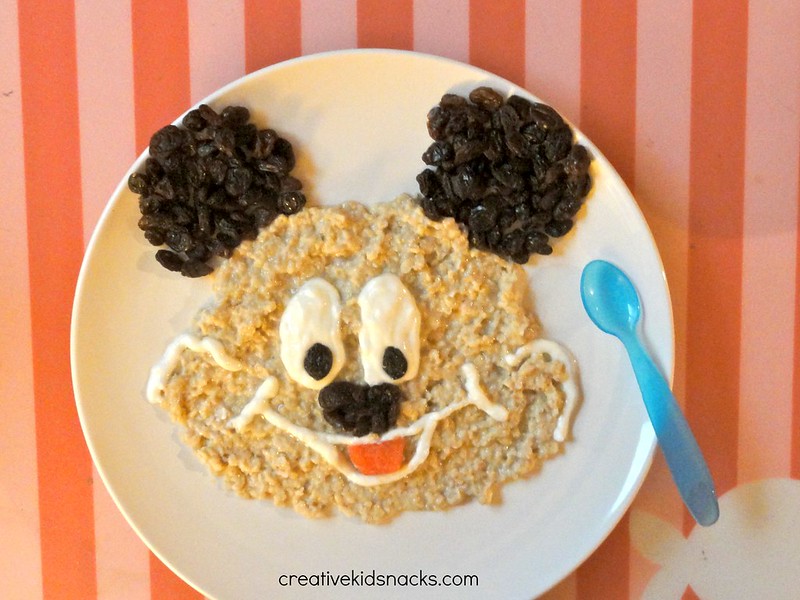
Mickey Mouse Breakfast made from oatmeal, yogurt, and raisins by CreativeKidSnacks.com

Mickey Mouse Breakfast


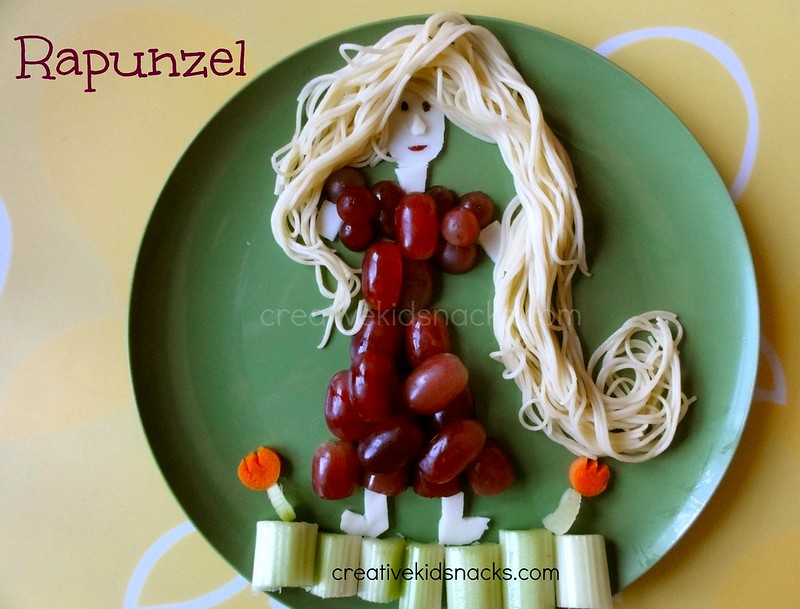
Rapunzel from #Disney's "Tangled" - from creativekidsnacks.com

Tangled


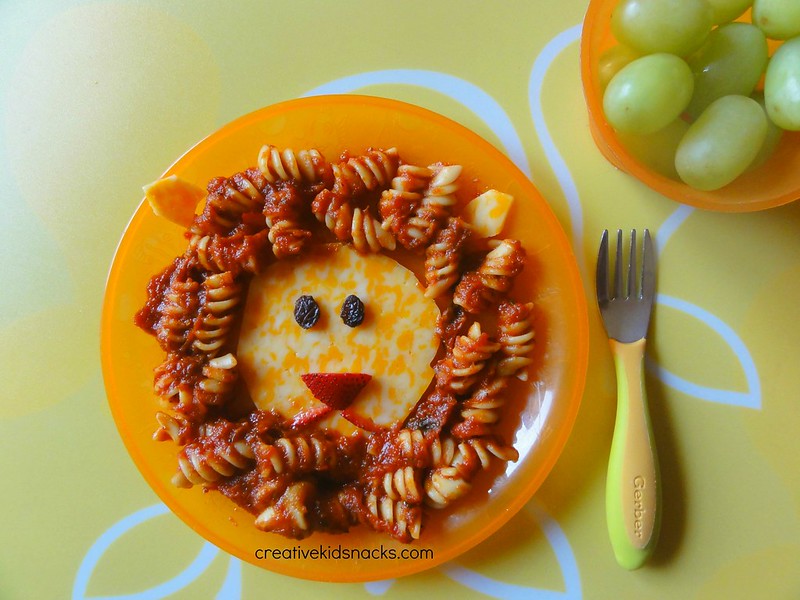
Lion King Snack by CreativeKidSnacks.com

Lion King Lunch


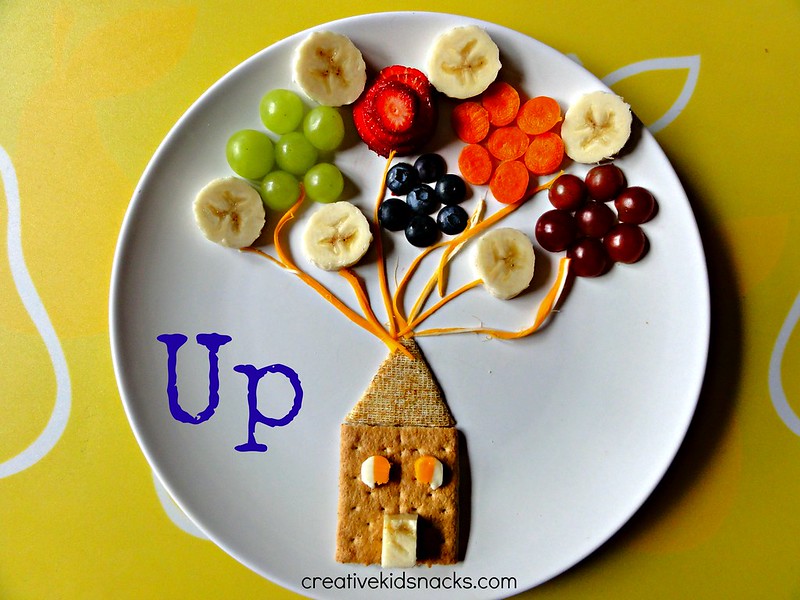
Disney's "Up!" by CreativeKidSnacks.com

“Up!”


Mike Wazowski


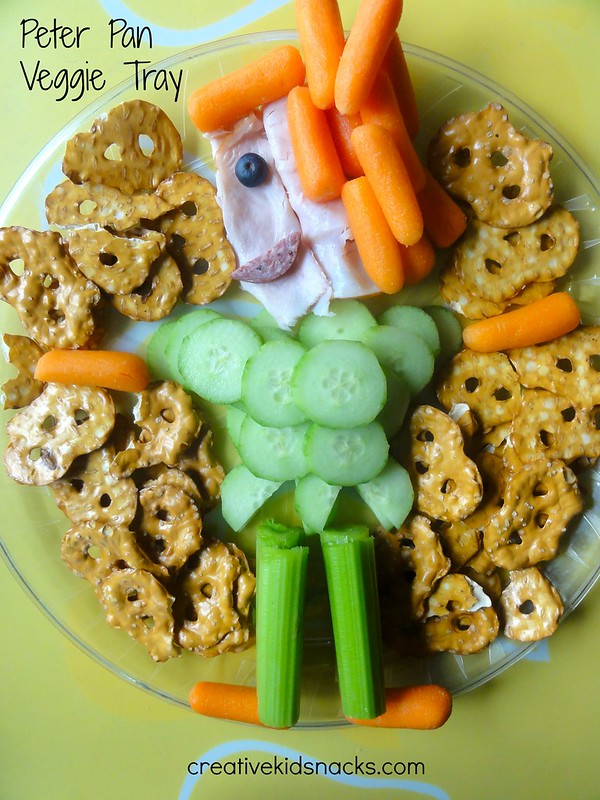
Peter Pan Veggie Tray


“Under the Sea” Snack

Thanks for checking out our Disney-inspired snacks!

(Sharing HERE)

Did you enjoy today’s snack?  Learn more about this blog here.

Filed Under: Disney, Finding Nemo, movies, snacks Tagged With: carrots, Disney, Finding Nemo, grapes, movies, Snacks, yogurt

Take Me Out to the Ball Game

May 2, 2013 by Amy Hudson

How many baseball fans do we have out there?  Kids in little league?  T-ball?  I’ve got a few fun ideas for you today inspired by one of our favorite game-day snacks: Beer Nuts!
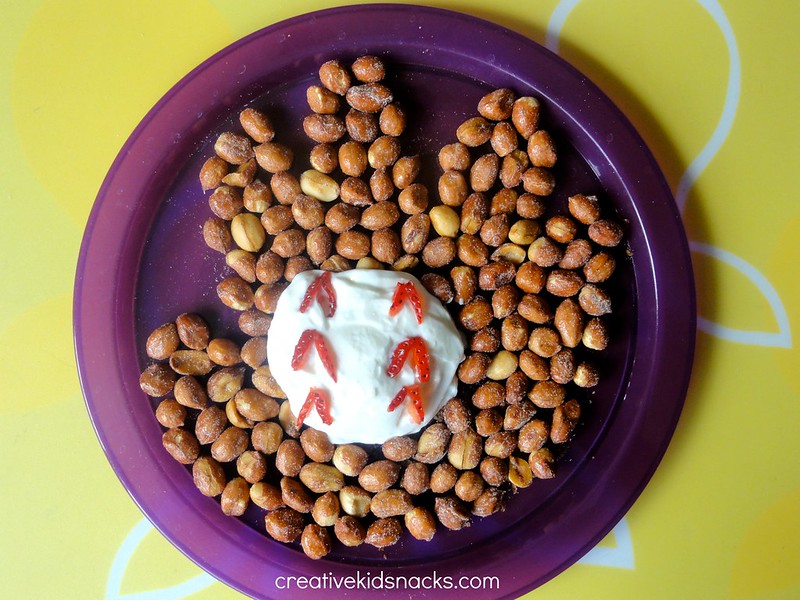
Fun Baseball Snack by CreativeKidSnacks.com.  Made from yogurt, strawberries, and peanuts.  Add more fresh strawberries and yogurt and serve in individual cups for a little fruit/yogurt/nut parfait!

…………………

I was so excited when Beer Nuts offered to send us some of their nuts to see what cute snacks we could come up with.  I asked for their classic peanuts, and a bag of almonds because they are one of the more nutritious choices out there.
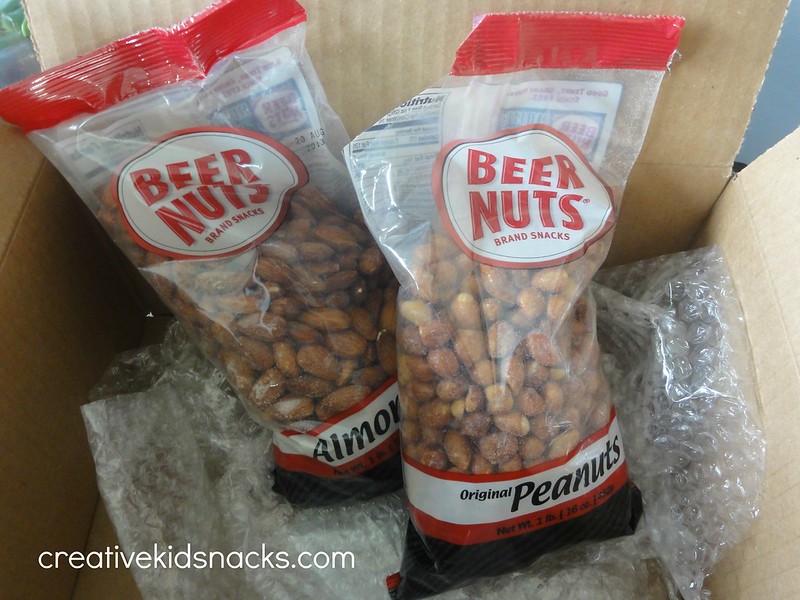
(Yay for yummy Beer Nuts!)

About Beer Nuts

Beer Nuts, by the way, are specialty nuts with a unique glaze on them that has a sweet and salty flavor.  The original skin-on peanuts were an accidental hit when their creator, Edward G. Shirk, who owned a small confectionary store called the Caramel Crisp back in 1937, occasionally made them available for free as an incentive to purchase one of his other products.  These tasty redskin nuts became so popular that Shirk decided to go from selling them over the counter by the scoop to package them up and making them available for widespread distribution.  That distribution started in local taverns, and the glazed peanuts were named Beer Nuts, as they became known as the perfect accompaniment to a glass of beer.  Nowadays they are a popular snack at baseball stadiums, circus, and other sporting events.

Now, let’s get on to what fun we had with these guys!
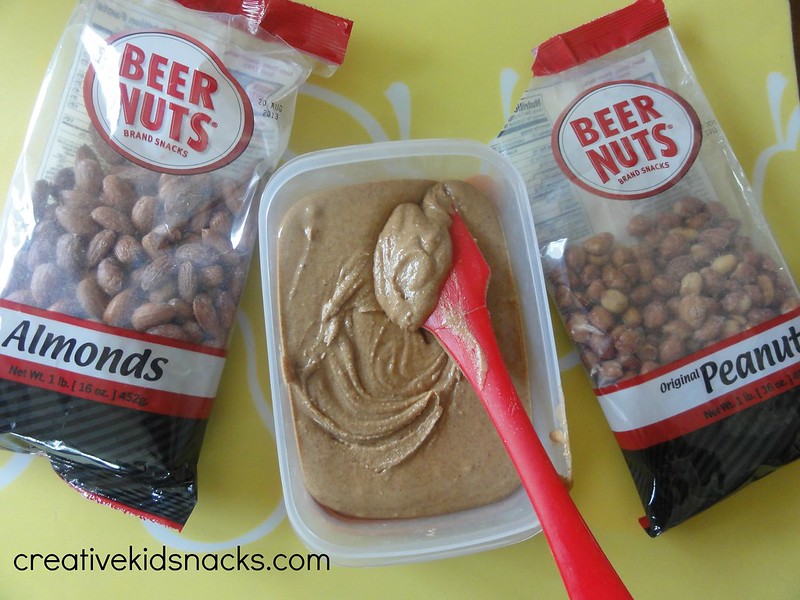
“Skin-on Peanut and Almond Butter”

I was excited to find out that research has shown substantial amount of extra health benefits in peanut skins!  These benefits include things like antioxidants (equal amounts, if not more that fruits and vegetables), anti-inflamatory properties, anti-aging compounds, even lowering blood sugar levels.  Read all about it in this article.

Most peanut butter is made with blanched, or skinless, peanuts.  This article explains why.  One of the reasons listed is “if not handled properly, the natural oil in the peanut skins could may become prematurely stale and cause off flavors when the peanut butter is being made”. Fair enough, but when we have a full pound of skin-on peanuts at our disposal, let’s go for a great-tasting peanut butter!

“Skin-on Peanut and Almond Butter”

2 cups Beer Nuts original peanuts

1 cup Beer Nuts brand Almonds

Combine ingredients in a Vitamix machine or food processor.  Continue mixing until a smooth, warm peanut butter consistency is reached. Mmmm.

This peanut butter is perfect because the Beer Nuts have that special “slightly sweet. slightly salty” coating on them already, so no additional ingredients (including oils, sugars, etc.) are required to make a great-tasting, delicious snack.

The girls and I ate this all up in a couple days by dipping apple slices into it or spreading it onto celery sticks.
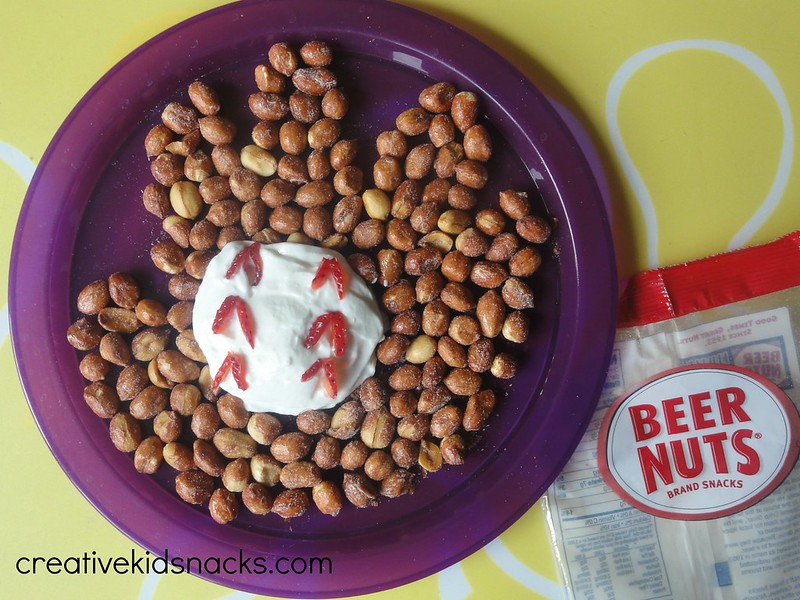
Baseball Mitt Snack

Fun Baseball Snack by CreativeKidSnacks.com.  Made from yogurt, strawberries, and peanuts.  Add more fresh strawberries and yogurt and serve in individual cups for a little fruit/yogurt/nut parfait!
The next fun thing we did with our Beer Nuts is make a baseball mitt.  To make it, simply spread your Beer Nuts brand peanuts onto a plate and arrange to look like a mitt as shown.  Leave a small round circle in the center of the mitt.  Next, spoon 5-6 tablespoons of yogurt into the round opening.  Use a butter knife to smooth out the dome of yogurt you have created.  (We used plain Greek yogurt.  I’m telling you, it’s absolutely astounding what kids will eat if it’s presented in a creative way)!  Complete your look by adding thinly sliced bits of strawberry to look like the red stitches on a baseball.

Add more fresh strawberries and yogurt and serve in individual cups for a little fruit/yogurt/nut parfait!

“Hitting a Home Run” Snack

Fun Baseball Snack by CreativeKidSnacks.com.  Made from yogurt, strawberries, and peanuts.  Add more fresh strawberries and yogurt and serve in individual cups for a little fruit/yogurt/nut parfait!

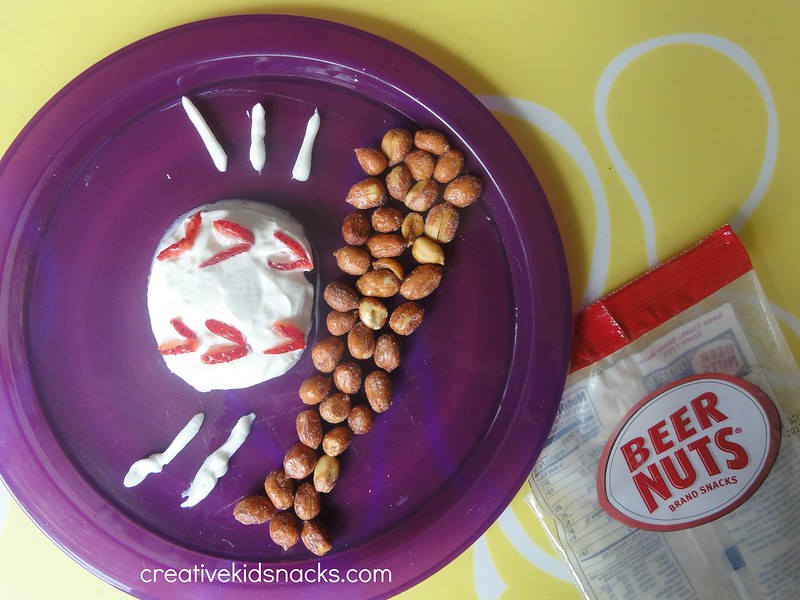
A third fun idea we had was to make a baseball bat and ball.  This size snack is a better serving size for just one.  When your child mixes the yogurt, strawberries, and peanuts together, they get a little parfait perfect for them!

Simply arrange your Beer Nuts brand peanuts on your plate to look like a bat as shown.  Follow the same directions as above for the baseball.  You can finish the look with a couple yogurt motion lines on either side of the ball to look like you are seeing the impact of the bat and ball.  We made those lines by scooping a tablespoon or so of yogurt into a plastic baggie, snipping off a corner of the bag, and piping it onto the plate where we wanted it.

If you enjoyed today’s post, check out our other sports-themed snacks!

(Sharing HERE)

Did you enjoy today’s snack?  Learn more about this blog here.

Filed Under: almonds, baseball, peanut butter, peanuts, sports, yogurt Tagged With: almonds, baseball, peanut butter, peanuts, Snacks, Sports, yogurt

Rocketship lunch

April 14, 2013 by Amy Hudson

3-2-1 Blastoff! What kid wouldn’t love a rocket ship going off into space for their lunch?

Awhile back I guest posted over at Build a Menu sharing this Rocket Ship Lunch.  I made a new one that is even better!  Today’s plate incorporates carrots, yellow pepper, fresh turkey breast, a high-protein wrap, and greek yogurt.  I made this lunch for my girls several times and each time I did, they were so excited!  I think it is one of their favorites!

Rocket kids lunch by CreativeKidSnacks.com | Turkey breast in a whole wheat tortilla wrap (high fiber and protein) with carrots & yellow peppers.  Made this for my own kids using technique shown in post with unsweetened GREEK yogurt and they ate it all upIngredients:

1 whole grain tortilla wrap (I use the Ole Xtreme wellness Multi-Grain.  It has the highest protein and fiber bang for your buck)

2 baby carrots

3 thin slices yellow bell pepper

1 T yogurt (any kind – I used greek for the high protein content)

To make Rocket Lunch:

Assemble your turkey wrap by placing some mayo or miracle whip,turkey breast and any other desired elements into tortilla.  Roll as you would a burrito.  Slice off one end completely so you have a straight bottom edge for your rocket.  For the top of the rocket, slice your wrap into a point shape.  Take a small portion of the tortilla you cut off and slice two thin triangles to place on the sides of your main wrap as shown above.

Next, slice a baby carrot into wheels.  Use two wheels for windows on the rocket.  Slice another baby carrot in half lengthwise and cut about 1/3 off of the top of each half to create a straight edge.  Place one half carrot in the center beneath the rocket, and slice your other remaining half in half again.  Arrange carrots with two thin slices of yellow bell pepper as shown.  Now you have your flames coming from the rocket!

Finally, it’s time to make your smoke trail and stars.  Spoon 1-2 tablespoons of yogurt into a plastic bag.  Snip off a tiny corner of the bag, and use the bag to pipe little stars all around the rocket as well as little trails of smoke beneath the rocket.

*I’ve mentioned before that I can get away using any kind of yogurt when it becomes a design piped on a plate.  Although my kids would never reach for a cup of unsweetened Greek yogurt from the fridge, they lick it all up when it’s served on a creative plate like this! *

If you enjoyed today’s snack about outer space, you might like our Solar System snack as well!

(Sharing HERE)

Did you enjoy today’s snack?  Learn more about this blog here.

Filed Under: carrots, everyday scenes, more fun stuff, Rocketship, Science, solar system, Space, turkey, yogurt Tagged With: carrots, Rocketship, Science, solar system, teaching and learning, turkey, yogurt

Mike Wazowski (2 versions)

November 16, 2012 by Amy Hudson

Monsters Inc is one of our favorite Disney Movies.  Mike Wazowski is one of the hilarious characters who works with Sulley.  I have two versions of Mike Wazowski to make for your Monsters Inc fan!

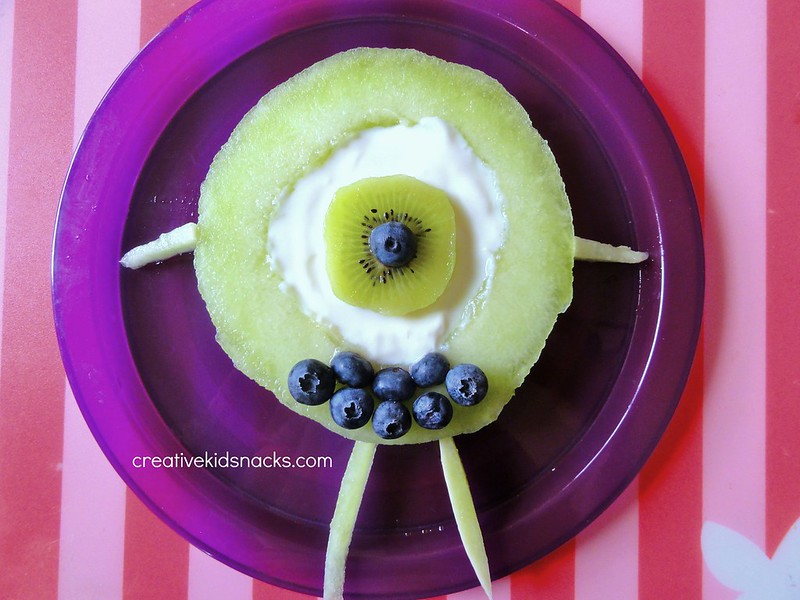
Do you recognize this guy from Monsters Inc.?  Mike Wazowski is made of a honeydew melon sliced and cored.  His eye is made of yogurt, a kiwi, and a blueberry.  His mouth is also made of bluberries.
Monsters Inc is one of the girls’ favorite Disney movies.  It’s one of those that they always watch from start to finish, never once losing interest.  It’s always great to have a few movies like that in the stash!
. . .
Here is another version of Mike, this time with sugar snap peas for the green part of his eye.  I thought that kiwi went better with the yogurt and other fruit in version 1, but loved the green color the sugar snap peas provided in version 2.
I sliced him up in order to make the eating part easier for my little Disney fan.
I can’t WAIT for Christmas season!  I have some really fun posts coming up for you with some ideas for fun snacks to get the kids in the spirit!  Not that they need any help with that!
(Sharing HERE).
What is your child’s favorite Disney movie? 


Filed Under: Disney, mike wazowski, movies, Uncategorized, yogurt Tagged With: Disney, mike wazowski, movies, super healthy, yogurt

Columbus Day Snack

October 5, 2012 by Amy Hudson

Columbus Day is celebrated the second Monday in October across the United States.


Teach the kiddos about why we celebrate Columbus Day with this easy snack!  Take one apple and slice to make the bases of each ship.  Next, slice a stick of celery to make the pole for the sail.  Finally, add a sail by using a cracker (I used Wheat Thins) and add a little sun made of cheese.
To create the waves as well as the names on the ships, use the following method with some yogurt:


Variations:
Use cheese for the sails (those square slices of cheese would work great)
Use little sandwich cut-outs for the boats
Make the pole out of a carrot stick
Use your imagination!

(Linking up HERE)


Filed Under: apple, celery, cheese, history, holidays, snacks, yogurt Tagged With: Apple, Celery, cheese, history, Holidays, Snacks, teaching and learning, yogurt

Read.Play.Eat: Blackout

October 3, 2012 by Amy Hudson

I’ve mentioned the awesome series going on at Sugar and Spice (my personal blog) on Learning and Literacy.  Each day, one of three cool bloggers share a kids story book along with an activity to go along with it.  Since I can’t resist making creative snacks, I’m also sharing those in each of my posts in this October series.

Here’s a little “teaser” for you to see the lunch I made.  Click the link below to see the great kids’ book that goes with it, along with a learning activity you and your child can try today!

Read
(Click here to see the book)
Play
(Go over to the post to see the learning activity!)
Eat
 
Re-create the rooftop scene by making a building out of a peanut butter sandwich, cutting the crusts into cubes for windows.  Next, slice 2 baby carrots in half and in half again for the main part of the bodies.  Thinly slice the remaining portions for the arms and legs.  We are seeing the people from behind, as shown in the cover of the book above, so no eyes are needed.  
I almost used a full banana for the moon, but it was way too big for the scale of the plate, so I cut a banana to shape.  
Create the stars by using your star icing tube attachment in the corner of a plastic bag.  Fill the bag with a little plain or vanilla yogurt as shown.  If you don’t have a star attachment for icing, just make little dot stars!
 
 
I hope you and your child have fun with this READ.PLAY.EAT activity.

(Did you go see the whole thing?  DO IT) 

Photobucket

Filed Under: banana, books, carrots, learning activity, lunches, peanut butter sandwich, yogurt Tagged With: banana, Books, carrots, learning activity, Lunches, peanut butter sandwich, yogurt

Winnie the Pooh

September 24, 2012 by Amy Hudson

We are in love with Costco’s strawberries.  We’ve bought them all summer and they are consistently delicious.
This week I had some strawberries in the house as well as some organic colby jack cheese, also from Costco.  I decided a Winnie the Pooh snack was in order.
Cut cheese to shape using a sharp knife.  I think I used two slices to make this snack, giving the leftover cheese to my two year old.  Next, create a shirt with strawberries sliced in half to lay flat on the plate and fit together to look like a shirt.
Add Pooh’s nose and eyes with some raisins, and draw his mouth and “Hunny” pot using the technique shown below.  Serve the rest of the yogurt on the side, and you have a fun and healthy snack!

(Linked HERE)
 

Filed Under: animals, books, cheese, Disney, movies, raisin, strawberries, TV shows, Winnie the Pooh, yogurt Tagged With: animals, Books, cheese, Disney, movies, raisin, Strawberries, super healthy, TV shows, Winnie the Pooh, yogurt

A Day at the Beach

September 13, 2012 by Amy Hudson

We had our last beach day of the summer this past weekend.
So sad to say goodbye to the lazy days of summer, but we can still commemorate them with a creative snack.
This snack is made by laying turkey breast along the bottom of a plate to look like sand.
Slice some watermelon squares to look like towels.  Cut a baby carrot in half and lay on top of the watermelon like little people.  Add little arms and legs by thinly slicing another baby carrot.  Finally, add little swim shorts and waves using the following method:


Finish the snack by adding a few goldfish in the water, and you are done!

(Linked HERE)
 

Filed Under: everyday scenes, nature, tropical island Tagged With: beach, carrots, everyday scenes, nature, super healthy, turkey, yogurt

Next Page »

I'm Amy. One of my passions is serving my two little girls healthy, wholesome food in unexpected ways. Lunch time has become a time of learning, imagining, and bonding for us as we use great food to create little works of art... Read More…

facebooktwitterpinterest instagram google+

Tags

animals Apple avocado banana Biblical Birthday Parties blueberries Books Breakfasts carrots Celery cheese Christmas cottage cheese desserts Disney Easter educational Eggs everyday scenes grapes ham history Holidays Lunches movies nature Oatmeal Party Food peanut butter peanut butter sandwich raisin Raspberries Snacks snowman Sports Strawberries super healthy teaching and learning turkey TV shows Valentines Day Weekly Kids Co-op Winter yogurt

Best of

Best Of

Copyright Note

Please feel free to use any of these ideas with your children at home, school, church, or anywhere you are inspired to make fun of lunch. If you would like to share a post on a blog or site, you may use one picture so long as you include a link to the original post. Please do not re-post the whole article or distribute printed-out content without written permission from the original author.

Grab our button!

Creative Kid Snacks Button

© Copyright Creative Kid Snacks · Design & Development by 4th & Market