• Home
  • New? Start Here!
  • Holidays
  • Parties
  • Contact
  • Facebook
  • Twitter
  • Pinterest
  • Google+
  • Instagram

Creative Kid Snacks

make fun of lunch!

  • Breakfasts
  • Lunches
  • Dinner
  • Snacks
  • Desserts

Ballerina

September 30, 2013 by Amy Hudson

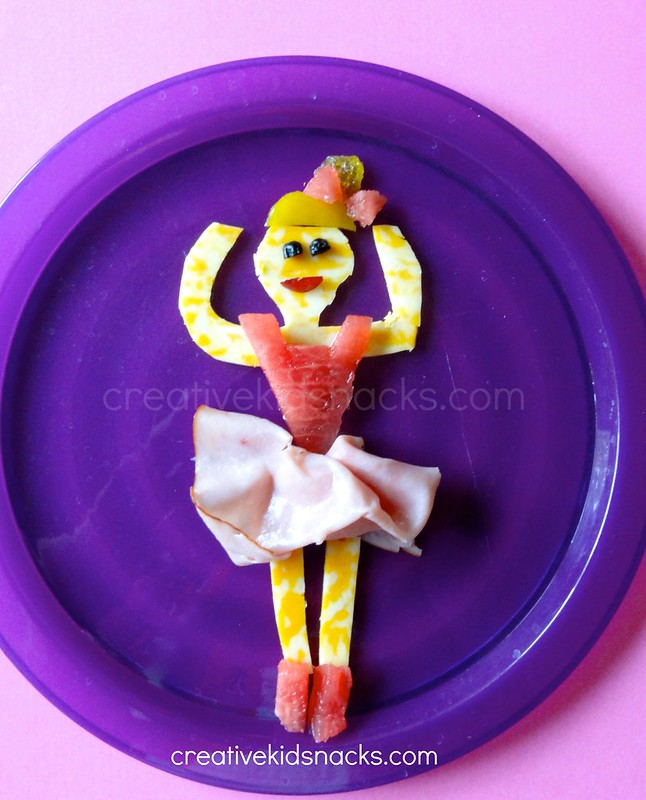
I have two little ballerinas in the house.  Grace has taken ballet and tap classes for a couple years, and dance has been one of her favorite things to do outside of school.  The recitals, where she gets to wear her costume, complete with poufy tutu, ballerina bun, and makeup – then ending with her getting a bunch of flowers and applause, are the highlight for her.  When recital time came around this last spring, we decided to make a little snack to celebrate it.
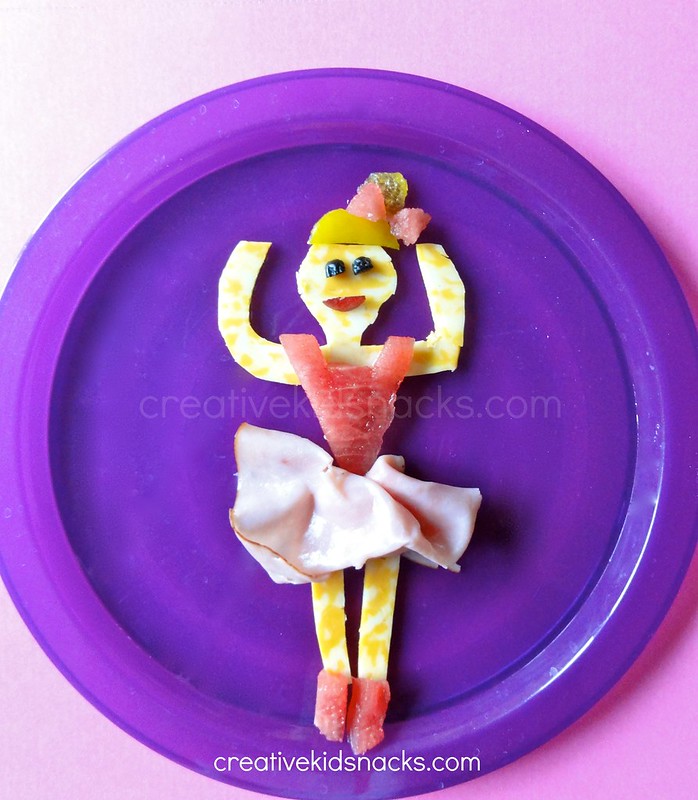
Creative Kid Snacks: Ballerina

Ingredients:

1 slice colby jack cheese

1 slice deli ham

1-2 cubes of watermelon

yellow bell pepper

1 dried blueberry

red grape

Directions:

Slice a piece of colby jack cheese into the shape of a ballerina’s head, arms, and torso.  We put the arms in the air as the ballerina twirled on her toes.  Next, lay a thin slice of watermelon cut to the shape of a top onto the ballerina’s chest area.  Add the two legs made from two thin slices of cheese, then lay the deli ham over top to look like a cute tutu.  Add two little toe shoes using bits of watermelon, a hair bun and top of yellow bell pepper, and a watermelon bow.  Slice a dried blueberry in half for her eyes, and add a thinly sliced red grape for her mouth.  So sweet!
Creative Kid Snacks: Ballerina


If you love cheese, make sure to check out our other adorable snacks made with CHEESE!  I’m sure you’ll find a favorite or two!

(Sharing HERE)

Did you enjoy today’s snack?  Learn more about this blog here.
Filed Under: Ballerina, dance, ham, snacks, watermelon Tagged With: Ballerina, dance, everyday scenes, ham, Snacks, Sports, watermelon

Octopus

August 18, 2013 by Amy Hudson

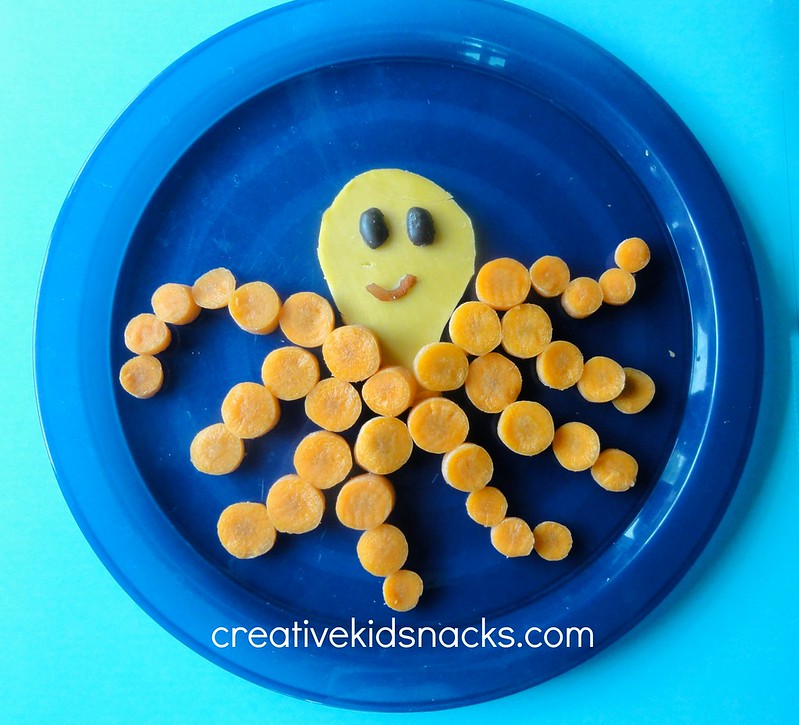
Looking for a healthy and fun after school snack for the kids?  Try this fun little octopus, which they’ll be sure to love.

Ingredients:

1 slice cheese (any kind)

8 baby carrots

1 red grape

2 black beans or raisins

Directions:

Slice your piece of cheese into a large, oval head with a bit of a neck on the bottom.  Lay that on the plate towards the top.  Next, slice your baby carrots into 5-7 circular sections each.  Throw all of your little carrot circles into a small bowl.  Arrange eight legs coming out of the octopus’ body, starting with the larger sized carrot rounds and ending the leg with the smaller sized carrot rounds.  This will look more realistic.  Add two black bean eyes, and slice a thin section off of a red grape that has been sliced in half.  Place onto your octopus to look like a happy smile.

Did you enjoy today’s snack?  Check out a whole bunch more SUPER HEALTHY AFTER SCHOOL SNACKS!  Try them all with your kids this fall!

(Sharing HERE)

Did you enjoy today’s snack?  Learn more about this blog here.

Filed Under: animals, carrots, cheese, snacks Tagged With: animals, carrots, cheese, octopus, Snacks

Back to School Snack Ideas

July 17, 2013 by Amy Hudson

Creative and Cute Back to School Snacks for the Kids

After the 4th of July comes and goes, summers for me have always taken a speedy nose dive into fall – which means back to school.  I suppose that being a school teacher before staying home with my girls has continued to remind me of the ever-repeating school cycle.

This fall, my oldest will be heading to kindergarten (Sniffle)!  Actually, I’m really very excited for her.  I know she will thrive in school setting; she absolutely loves to learn and loves making new friends.  I’m thankful to have reasons to actually look forward to her being able to start school!

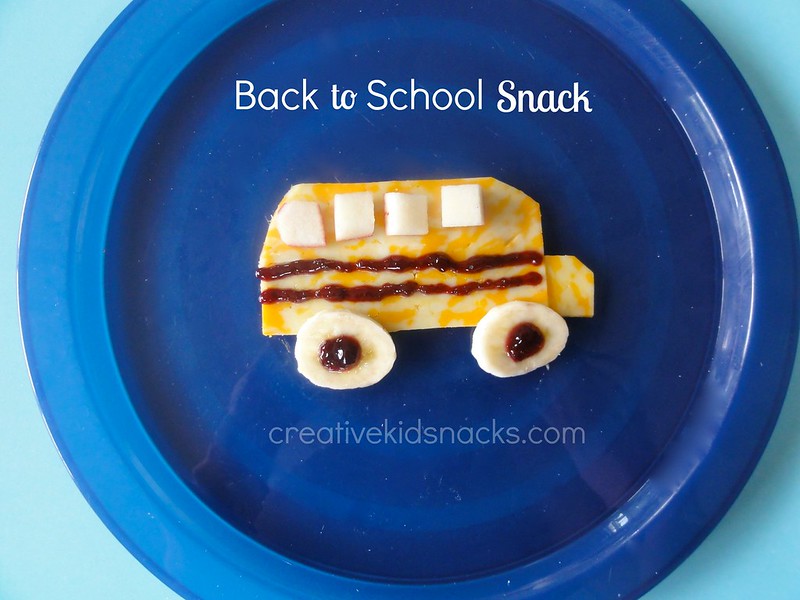
In honor of the start of a new school year, we have a back to school snack for you today!  Make this snack the day before school begins, or after the day is out, whichever you feel like!

Creative and Cute Back to School Snacks for the Kids

Ingredients:

1 slice of colby jack or cheddar cheese

1 tbsp jam (spooned into plastic baggie for piping)

2 slices banana

1 small section of apple

Directions:

Slice cheese into a rectangle, then slice corners off of the top of that rectangle as shown above to use as the main body of the bus.  Next, slice a small square with a corner sliced off to place at the front of the bus.  Add 2 banana wheels.  Take a small plastic bag with jam inside, snip off a tiny corner of the bag, and pipe two lines accross the bus as shown.  Next, pipe small dots of jam onto bananas to look like wheels.  Finally, slice a section of an apple into several small thin squares.  Arrange on bus to look like windows.

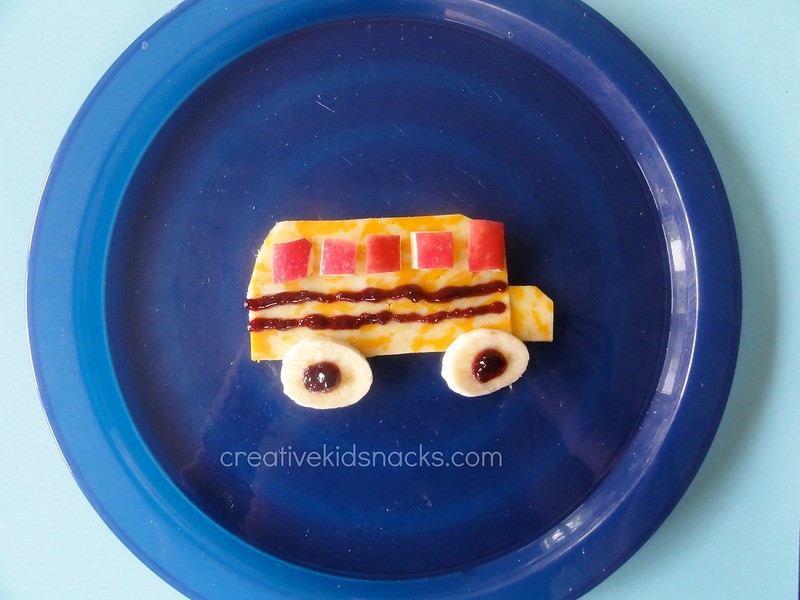
In the version shown above we placed the apples skin side down.  If you like, you could also serve the snack with the skin side up, as shown here:

Creative and Cute Back to School Snacks for the Kids

Which version to you like better?  Let the kids decide!

Other Back to School Snacks We Love:

We’ve also scoured the great world of the web to find some other back to school snacks that are sure to get the kids excited for fall!

Click on either the photo or the title to be taken to the source for directions on how to make each awesome treat.

Back to School S’mores

Creative and Cute Back to School Snacks for the Kids

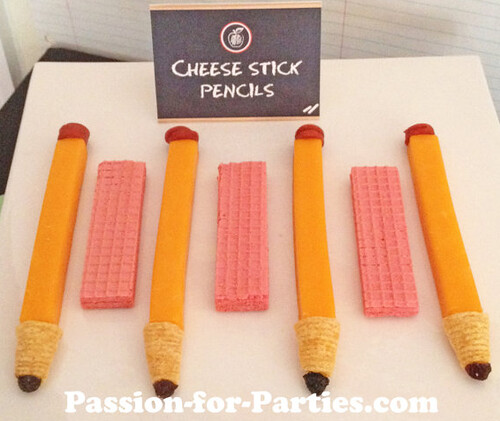
Cheese Stick Pencils

Creative and Cute Back to School Snacks for the Kids

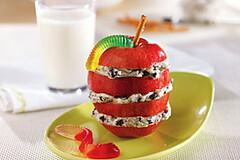
Oreo – Apple Snack Stacks

Creative and Cute Back to School Snacks for the Kids

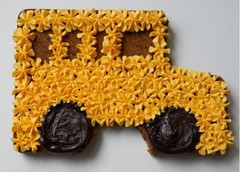
Back to School Bus Twinkies

Creative and Cute Back to School Snacks for the Kids

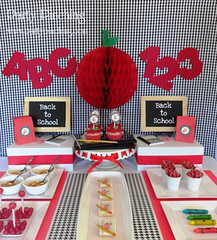
Back to School Party (includes all kinds of cute food)

Creative and Cute Back to School Snacks for the Kids


One of my favorites from the Back to School Party

Creative and Cute Back to School Snacks for the Kids

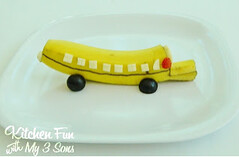
Back to School Banana Bus

Creative and Cute Back to School Snacks for the Kids

Giant School Bus Chocolate Chip Cookie

ABC Lunch

Creative and Cute Back to School Snacks for the Kids

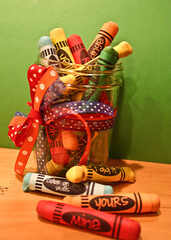
Edible Crayons

Creative and Cute Back to School Snacks for the Kids

What other cute ideas do you have for celebrating the start of school?  Leave your links in the comments below!  I’d love to add them to my Pinterest boards for future inspiration!

(Sharing HERE)

Did you enjoy today’s snack?  Learn more about this blog here.
Filed Under: snacks, Uncategorized Tagged With: Back to School, educational, Snacks

Shrek

June 17, 2013 by Amy Hudson

Today, I’m sharing a new snack over at Housing a Forest.  Meet Shrek!  I did not realize this, but Shrek, Shrek 2, and Shrek 3 were some of the top grossing movie sales of all animated movies throughout the last 15 years.  Shrek is much beloved, so we made him into a healthy snack.

Creative Kid Snacks | Shrek

Click HERE to be taken to our Shrek post at Housing a Forest.

Have a great day!

Filed Under: apple, movies, snacks Tagged With: Apple, cheese, movies, nuts, Shrek

Baa Baa Black Sheep

June 11, 2013 by Amy Hudson

Baa Baa, Black Sheep is a common nursery rhyme that first appeared in Tommy Thumb’s Pretty Song Book published in 1744!  This was a collection of English nursery rhymes, and Baa, Baa Black Sheep, along with Humpty Dumpty, Hey Diddle Diddle, Old King Cole, and more, have been beloved songs and verses chanted by many of us throughout the centuries.  When I became a mom, I made sure to have a copy of the classic nursery rhymes in my library for my own kids to learn and appreciate these little pieces of history.

My two children had the privilege of knowing most of their great grandparents for some of the early years of their life.  I always marveled at the way both great grandparent and great grandchild could recite their favorite nursery rhymes together and how great grandpa was taken back to his childhood as my children were experiencing theirs.

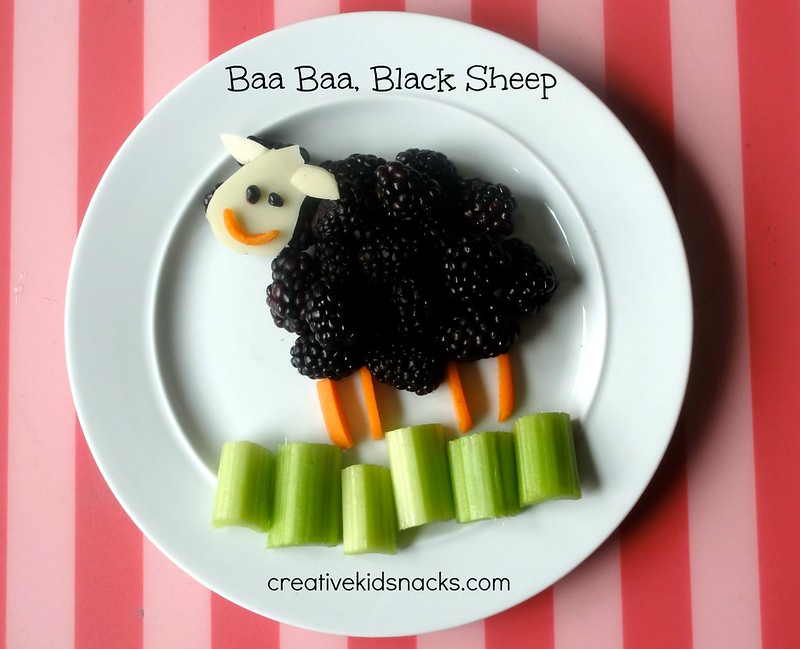
Baa Baa, Black Sheep

Creative Kid Snacks: Baa Baa Black Sheep

Ingredients:

handful of fresh blackberries

1 slice white cheese (mozzarella, provolone, swiss)

2 baby carrots

2 stalks celery

Directions:

Place blackberries in a large circle in the center of the plate.  Add a few extra blackberries where a head would be as you will use this area as a surface on which to lay the face.  Slice a large teardrop along with two small teardrop shapes out of the white cheese.  Place those on the head area to define the face and ears of your sheep.  Next, slice a baby carrot in half and then into 4 thin strips out of one of the halves.  Arrange the 4 strips of carrot below the sheep’s body to look like legs.  Take your knife and carefully slice a little smile out of your remaining half of a baby carrot.  Place the smile on the face.  Use two tiny blackberry fruit bits for eyes, and finish the look by adding small chunks of celery to look like the grass in which the sheep is grazing.

Nutritional Benefits of this Snack

Blackberries contain Vitamin C, Vitamin A, Vitamin E, Vitamin K, Manganese and fiber.  They are one of the top 10 antioxidant foods, known to contain polyphenols that helps reduce the risk of cancer and heart disease.  They also help to reduce inflammation.  Read more here.

Celery is a fantastic source of fiber, and it is said that a person burns more calories eating and digesting celery than the celery gives you.  It’s a “negative calorie” food!

Carrots contain beta carotene and lots of Vitamin A which helps with eyesight.  Nutrients in carrots are also linked to great skin, cleansing of the body, and lowered risk of stroke and heart disease.  See more here.

If you loved today’s snack, make sure you check out our other Book-Inspired plates along with our other Super Healthy Snacks!

(Sharing HERE)

Did you enjoy today’s snack?  Learn more about this blog here.
 

Filed Under: books, carrots, cheese, snacks Tagged With: Ba Ba Black Sheep, Books, nursery rhymes, nutrition, sheep, super healthy

Learning about Cells

May 14, 2013 by Amy Hudson

I remember learning about cells when I was in 7th grade.  For extra credit, I made a cell cake.  My mom helped me decorate a round cake and create all of the cell components on top using different colored icing and piping instruments.

The cake turned out so well that my teacher decided to place it in a display case in a prominent area of the school.  I laugh thinking back at that because the cake sat in there for so long that it started to decompose, and we were never able to eat any of that delicious cell cake!

Aside from earning me those extra credit points, that cake helped me to remember and love learning about the cell.

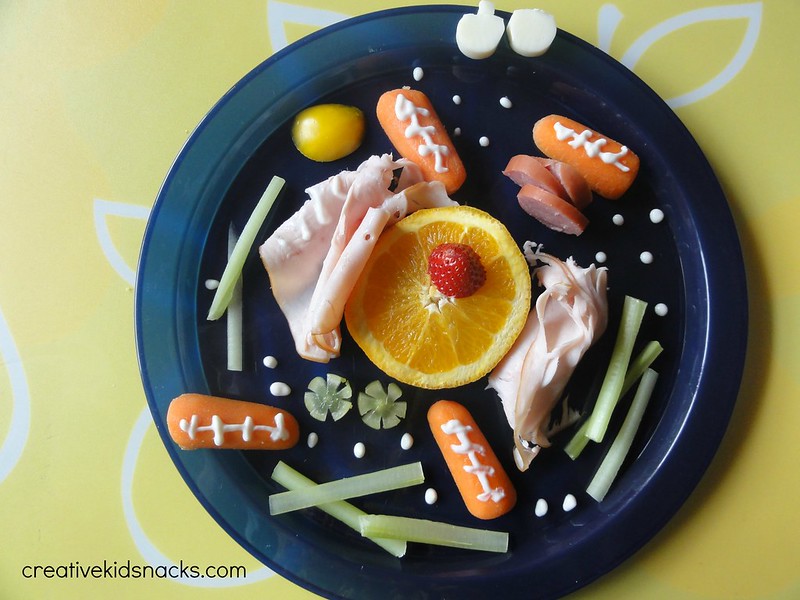
Today’s snack is a healthy version of that same experience, and it could be done in a science classroom as a test on the parts of a cell, or at home as part of a home school curriculum.  You could also make it for your younger kids just to teach them about the cell and how it all works, like we did!

Make a cell out of healthy foods from the fridge - great for a science lesson for home schoolers, science classroooms, or simple reinforcement at home when your student learns about cells.

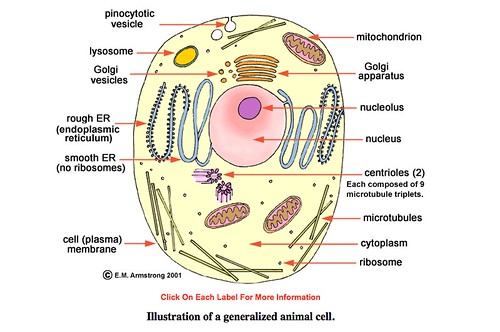
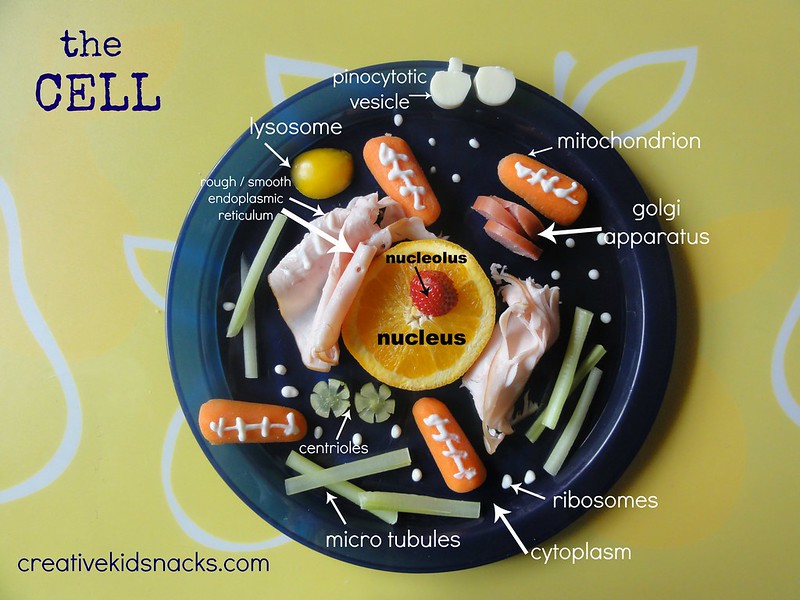
As I was creating this snack for my 5 year-old, I pulled up this great site which gives clear explanations of each part of the cell, along with easy-to-understand drawings and diagrams.  I modeled today’s plate after this diagram on the site:

Click photo to be taken to source

Cells have lots of different components, and can be made using just about anything you have on hand in the kitchen.   Since we were going for a healthy snack today, here is the list of ingredients we used:

Ingredients

celery (1 stalk)

turkey breast (2 slices)

yellow pepper

strawberry (1 small slice)

orange (1 slice)

carrots (2)

green grapes (1)

yogurt (1 tablespoon)

hot dog slices (3 thin slices)

string cheese (2-3 small slices)

Make a cell out of healthy foods from the fridge - great for a science lesson for home schoolers, science classroooms, or simple reinforcement at home when your student learns about cells.

Create your cell by arranging each element on the plate as shown.

The carrots are sliced in half so that they lay flat on the plate.

To create the shape of the centrioles (green grapes), slice a green grape into wheels, then slice tiny triangles out of the edges.

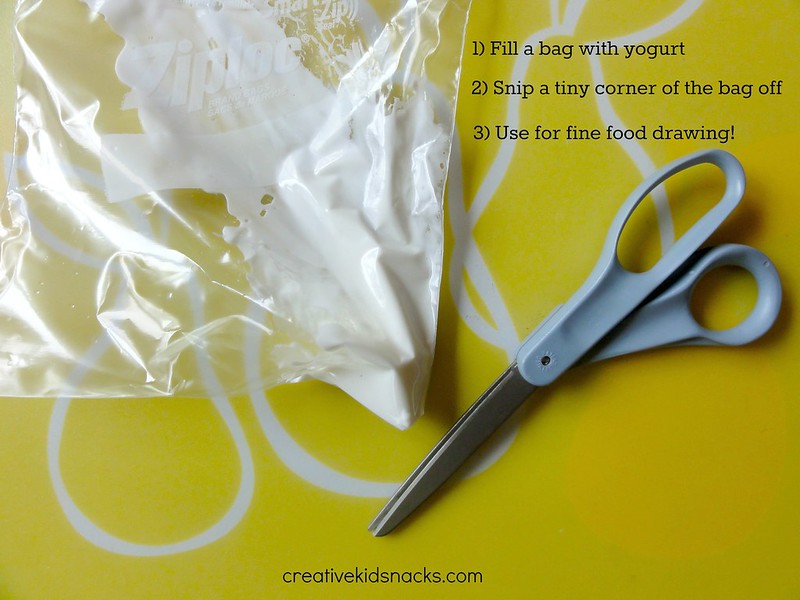
The ribosomes (yogurt) are made using the following technique (which we absolutely love!):

The finished product:

Make a cell out of healthy foods from the fridge - great for a science lesson for home schoolers, science classroooms, or simple reinforcement at home when your student learns about cells.

How to use this snack / activity

Challenge your (older) student to create a cell at home for a snack using some of the ingredients pictured here.  Your student can see if he can name each part of the cell and what its function is when he is done.

Teach your younger children about the human body using this snack.  You could draw the different parts on index cards, and write the function of the part on the back.  Your children can pick up one card at a time to learn what that part of the cell does.  They can even eat that part as you explain what its job is.

Science teachers could use this as an assessment activity.  Provide foods such as those pictured here, and assign students to create a plate of the animal cell, and be prepared to explain what each part is and its function.

Use resources like this to dig deeper and learn even more together with your child!

More Science Related Snacks

Solar System

Volcano

Under the Sea ecosystem

(Sharing HERE)

Did you enjoy today’s snack?  Learn more about this blog here.


Filed Under: cells, snacks Tagged With: Celery, cells, educational, grapes, orange, Science, Strawberries, super healthy, teaching and learning, turkey, Weekly Kid, Weekly Kid's Co-op, yogurt

Finding Nemo Snack

May 6, 2013 by Amy Hudson

Finding Nemo is one of Disney’s most beloved movies.  Even my two year old, who is scared of some of the other Disney movies at her age, likes Finding Nemo (although she does hold her sister’s hand during the shark part when we watch it at home).  We love all of the characters, including Dory, Marlin, Squirt, Crush, Mr. Ray, and, of course, Nemo.

Finding Nemo Snack

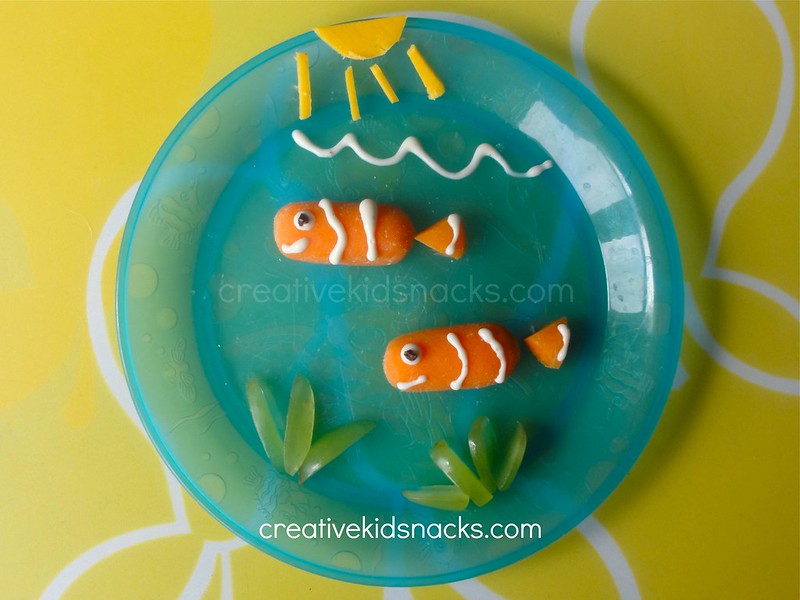
Finding Nemo: an adorable kid snack featuing Nemo and Marlin.  Visit CreativeKidSnacks.com for full directions as well as other Disney snacks!

Ingredients:

2 baby carrots

1 green grape

1 slice of cheddar cheese

1 T of yogurt (plain, Greek, etc.)

1 raisin or currant

Slice a baby carrot in half lengthwise, and lay each half on the plate.  This will be Marlin and Nemo’s bodies.  Take another baby carrot, slice in half lengthwise, and slice two triangles out of one of the halves.  Place these triangles onto the back of each body for tails.  Next, spoon a tablespoon of yogurt (I love to use plain Greek yogurt here, it’s got the most protein, and it’s actually better that it’s not sweetened, because it’s being served atop a carrot!).  Snip a tiny corner off of the bag, and pipe yogurt onto the fish’s bodies, making two stripes on the body, one on the tail, then an eye and a smile for each fish.  Finish the look by using the remainder of the yogurt to pipe little waves across the top of the plate to look like the fish are under water.

Slice a green grape in half lengthwise.  Next, slice each half into thin sections, and arrange on the plate to look like sea plants.  So simple, yet so adorable!

More Fun and Healthy Disney Snacks

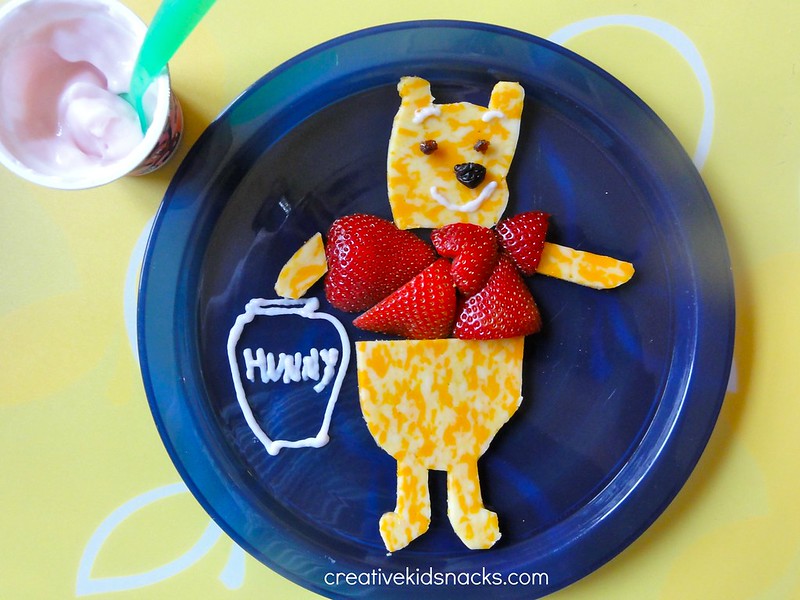
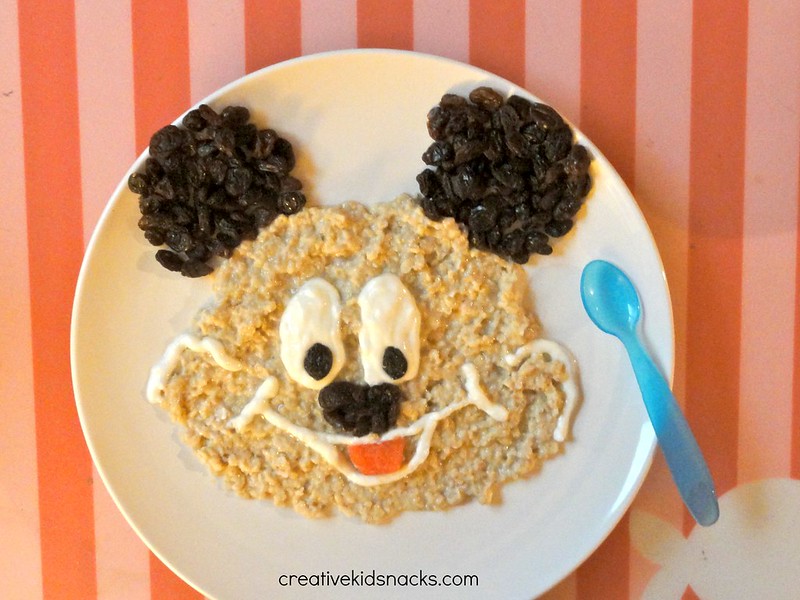
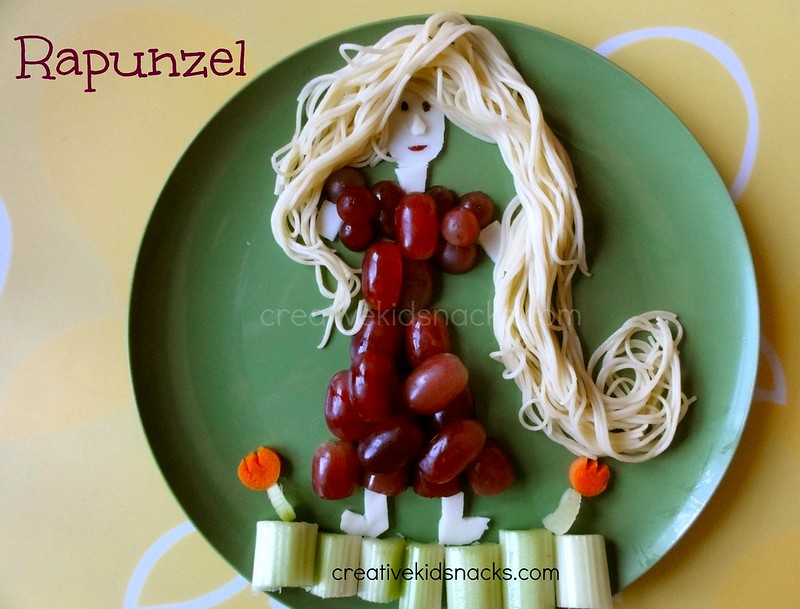
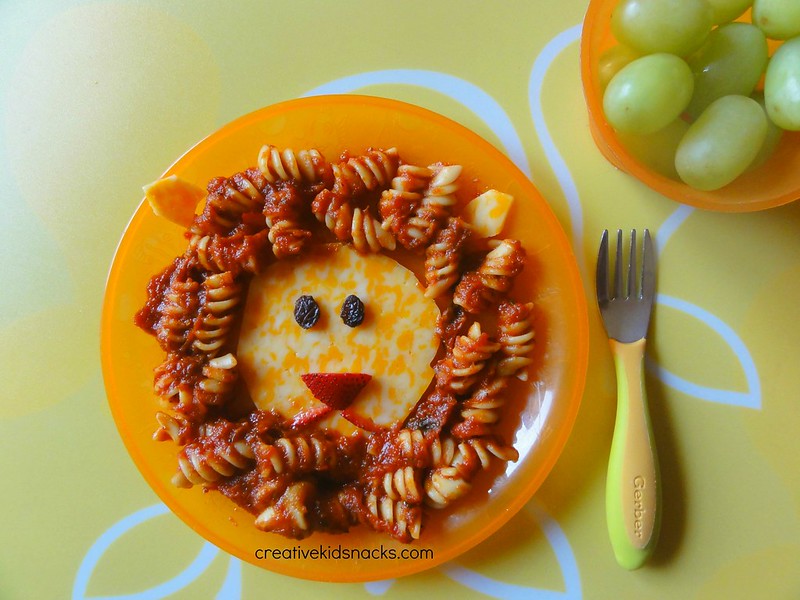
Check out the other Disney snacks we’ve made.  Making your child’s favorite Disney characters using healthy foods is a great way to delight them as they eat, and encourage them to gobble up all of that healthy stuff you’ve used to make them!  Here are some examples:

Winnie the Pooh by CreativeKidSnacks.comWinnie the Pooh


Mickey Mouse Breakfast made from oatmeal, yogurt, and raisins by CreativeKidSnacks.com

Mickey Mouse Breakfast


Rapunzel from #Disney's "Tangled" - from creativekidsnacks.com

Tangled


Lion King Snack by CreativeKidSnacks.com

Lion King Lunch


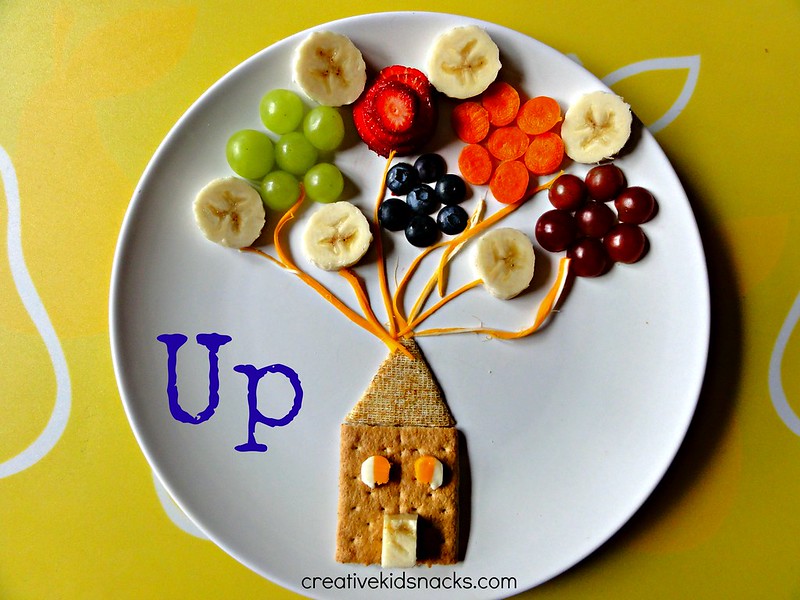
Disney's "Up!" by CreativeKidSnacks.com

“Up!”


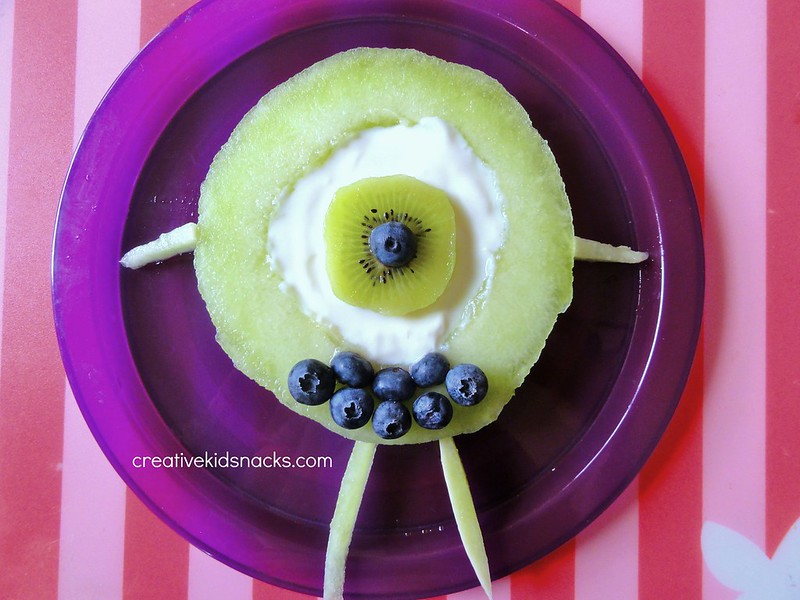
Mike Wazowski


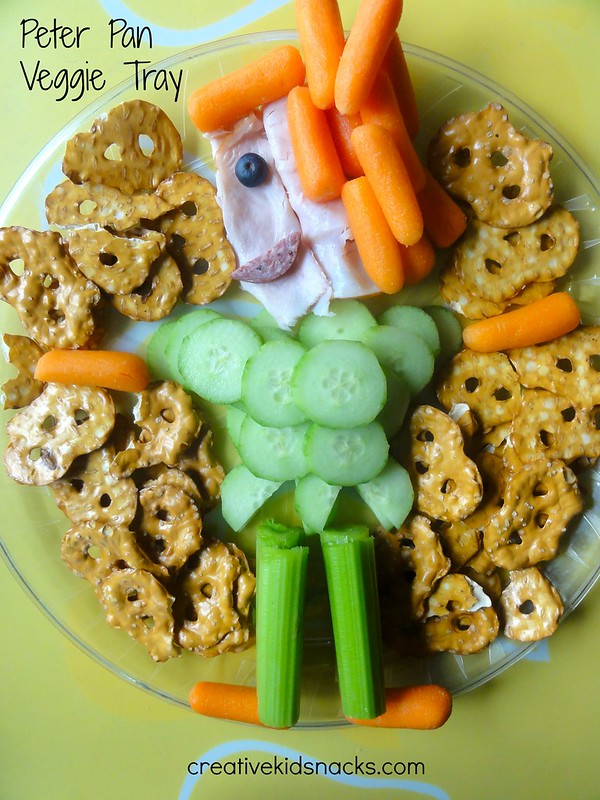
Peter Pan Veggie Tray


“Under the Sea” Snack

Thanks for checking out our Disney-inspired snacks!

(Sharing HERE)

Did you enjoy today’s snack?  Learn more about this blog here.
Filed Under: Disney, Finding Nemo, movies, snacks Tagged With: carrots, Disney, Finding Nemo, grapes, movies, Snacks, yogurt

Grinch Party Poppers

December 4, 2012 by Amy Hudson

The Grinch is one of Dr. Suess’ most beloved characters, and at Christmas we love to watch “How the Grinch Stole Christmas”.
Just like we love to make Christmas trees, wreathes, snowmen, Santa, and reindeer for snacks this time of the year, we also love Mr. Grinch.

Today’s snack is a perfect finger food to put out for the kids at a Christmas party.
These would also be perfect for a Christmastime sleepover, featuring popcorn, the Grinch movie, and these scrumptious little poppers.
Healthy, cute, and super fun, you know these little guys will be a hit.
Here’s how to make them.

Step 1: Collect your ingredients and assemble Grinches

 
(Depending on how many Grinch poppers you would like to make, you will need that many of the following):
 
-slice of white string cheese (at least 1/3 inch thick)
-strawberry
-banana slice (at least 1/3 inch thick)
-green grape (with bottom sliced off so it lays flat)
-melted chocolate. (1/2 of a Hershey’s bar, broken into pieces and microwaved until melted, stirring at 20 second intervals will be plenty to make up to 25 poppers)
 
Assemble each Grinch by sliding each piece up a plastic toothpick.  I get mine from the dollar store.  They come in a package of assorted colors with little hearts on the top.  They are the perfect size, and not too sharp for the kids to eat off of.
 

 Step 2: Melt Chocolate

 
 Depending on how many poppers you are making, melt the appropriate amount of chocolate.  I used a simple Hershey bar in this recipe.

1/2 of a Hershey’s bar, broken into pieces and microwaved until melted, stirring at 20 second intervals will be plenty to make up to 25 poppers.

  Step 3: Pipe Grinch faces

Place your melted chocolate into a piping bag with a very small tip attachment; 
or do it the easy way by using a ziploc bag with a tiny snip off of one corner to pipe your faces.
Make 2 eyes with frowning eyebrows above them.  Next, make a wide smile with bumps and a little point at the bottom middle.

Step 4:  Chill, serve, and enjoy!

 
Chill in the refridgerator for at least 15 minutes.
 

 My little girls LOVED these guys.  I made about 10 of them for today’s post, and they had to be cut off after 4 each!  (They still hadn’t had their lunch yet)!
 
TIP: Pipe Grinch faces onto grapes and chill in advance if you want to work ahead and prevent the rest of the ingredients from being out in the air too long.
 
(Sharing HERE)
 
Follow us on Facebook / Pinterest
 

Filed Under: banana, books, cheese, christmas, desserts, holidays, movies, Party food, popular snacks, snacks, strawberries Tagged With: banana, Books, cheese, Christmas, desserts, Dr. Seuss, Grinch Party Poppers, Holidays, movies, Party Food, Snacks, Strawberries

4 easy play date snacks

November 19, 2012 by Amy Hudson

I have some easy, healthy, and fun snacks for your next play date.

Now that the weather is cooler, we will be hosting more play dates here at the house as opposed to meeting our friends out at the park, pool, or outside entertainment.
I thought I’d share a few ideas of healthy and cute foods to put out for the kids to inhale munch on as the moms chit chat!

#1: Peanut Butter Dipping Fun 

  Provide some peanut butter for dipping and some peanut butter friendly items like celery, apples, graham crackers, and bananas.  Each kid can get their own little cup of peanut butter too – those individual ones would be great, and they could collect their dipping stuff from the main serving platter too!

#2: Skewers

 Just about anything served on a skewer is irresistible to the kids!
I made these to include awesome vitamin packed fruits as well as protein rich ham and cheese for calcium.
Collect items for your skewer, such as grapes, pineapple, strawberry, ham, string cheese chunks, etc.  Arrange in an adorably cute pattern.
Cut the pointy end off of the skewer, and serve!

#3:  Fruit Flowers 

These happy little flower snacks take less than a minute to throw together.
With a clementine orange arranged as flower petals, grapes as a stem and leaves, and some cereal beneath it all, a sweet and healthy snack is ready for as many as you need!


#4:  Happy Friends

 Create some happy little friends using some rolled up turkey or ham for legs, a slice of cheese for a body, carrot arms, banana hair, and blueberry eyes with a grape mouth.
You can make these guys with anything you have on hand.  You will be a hit with your kids’ friends by offering them such a fun little friend for a snack!

(Sharing HERE)


Filed Under: for a crowd, play dates, snacks Tagged With: for a crowd, play dates, Snacks

Joshua and the battle of Jericho

November 6, 2012 by Amy Hudson

Joshua 6:1-27 tells the story of the great city of Jericho with walls so high and fortified that no adversary could break through.  God called the Israelite leader Joshua to march around the city with the priests blowing their trumpets of ram’s horns in front of the ark of the covenant for six days.  On the seventh day, they were to march around the city seven times and all of the Israelite people were to shout.  When this happened, God told Joshua, the great walls of the city would come crashing down, and, in this way, the Lord would give the city over to His people.
Read this story with your child, or read the story from the children’s bible (HEREis the one we use), and then create this story for lunch!
Build walls using grapes sliced in half, laid flat side down onto the plate.  Next, slice baby carrots in half lengthwise and lay a couple of them down to be the Israelites.  Thinly slice the other half of the baby carrot and cut to shape for arms and legs.  Complete the scene with some green celery grass below the city walls and add two small triangular slices of pineapple for the priest’s horns.  A nice sun in the sky completes the picture.
(By the way, once I saw the photo, I realized that the Jericho guy looks like he’s smiling . . . oops!  That was supposed to be a round mouth saying “oh no!”)
Once this lunch was complete and we retold the story, Grace “tore the walls down” as they fell in the story.  She had fun with that!
Finally, I sliced up the “grass” below the city for her to dip into her peanut butter.
Variations:
Build the wall with other fruit like strawberries, bananas, or blueberries.
Use pineapple for the sun, or cheese for the trumpets.
Enjoy!
Check out our other bible stories HERE.
(Linking up with these fine parties)

Filed Under: biblical, carrots, celery, cheese, grapes, history, lunches, pineapple, snacks Tagged With: Biblical, carrots, Celery, cheese, grapes, history, Lunches, pineapple, Snacks

Next Page »

I'm Amy. One of my passions is serving my two little girls healthy, wholesome food in unexpected ways. Lunch time has become a time of learning, imagining, and bonding for us as we use great food to create little works of art... Read More…

facebooktwitterpinterest instagram google+

Tags

animals Apple avocado banana Biblical Birthday Parties blueberries Books Breakfasts carrots Celery cheese Christmas cottage cheese desserts Disney Easter educational Eggs everyday scenes grapes ham history Holidays Lunches movies nature Oatmeal Party Food peanut butter peanut butter sandwich raisin Raspberries Snacks snowman Sports Strawberries super healthy teaching and learning turkey TV shows Valentines Day Weekly Kids Co-op Winter yogurt

Best of

Best Of

Copyright Note

Please feel free to use any of these ideas with your children at home, school, church, or anywhere you are inspired to make fun of lunch. If you would like to share a post on a blog or site, you may use one picture so long as you include a link to the original post. Please do not re-post the whole article or distribute printed-out content without written permission from the original author.

Grab our button!

Creative Kid Snacks Button

© Copyright Creative Kid Snacks · Design & Development by 4th & Market