• Home
  • New? Start Here!
  • Holidays
  • Parties
  • Contact
  • Facebook
  • Twitter
  • Pinterest
  • Google+
  • Instagram

Creative Kid Snacks

make fun of lunch!

  • Breakfasts
  • Lunches
  • Dinner
  • Snacks
  • Desserts

Resurrection Eggs

February 27, 2013 by Amy Hudson

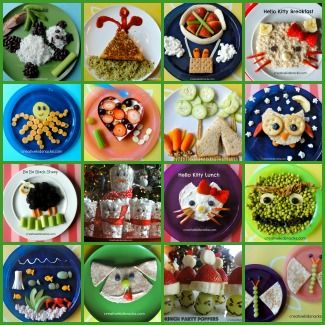
The following post is something originally seen on my other blog, Sugar and Spice.  I started it in 2011 and it is where I first blogged about the creative snacks I had started making for my daughter.  Those snacks became so popular that they morphed into their own blog, which is Creative Kid Snacks.

I decided to post this entry here today because Easter is coming up, and this idea is a great way to use Easter egg coloring to teach the real Easter story to your kids.  I hope you enjoy!

Are you looking for a way to include the real story of Easter in your egg-coloring this year?
I would highly recommend making Resurrection Eggs!  I had the idea last year to make them and they worked so well as a teaching tool and as a way to incorporate the real Easter story, that they are now a mainstay of our Easter festivities.

To make them you will need:

1) Regular egg-dying supplies (i.e. a kit from the grocery store)
2) Colorful tissue paper (available at the Dollar Store)
3) Glue – any kind
That’s it!
You will make 4 eggs.  As shown in the picture above (from left to right), you will make (1) a passover egg, (2) a cross egg, (3) a tomb with the stone rolling away egg, and (4) a heaven egg.

Process:

1) Dye your eggs first and let them dry.  Choose colors against which the tissue paper you are using will pop.  This coming year I will change the first egg’s backdrop color to a pale orange, I think.
2) Cut out your tissue paper to make the shapes shown above.
 – Passover egg will be a red goblet and a yellow loaf of bread.
 – Cross will be a red cross shape to also represent that Jesus bled while on the cross as our sacrifice
 – The tomb will be a wide square with an archway cut out of the middle.  You will also need a large circle for a boulder.
 – Heaven will be a long blue cloud with yellow beams coming out.
3) Glue tissue paper onto eggs as shown and let dry.

Explanation for each egg:

Passover Egg:  Jesus had a final meal with his disciples called a Passover meal.  He explained to his disciples God’s plan to save the world from their sins through Jesus.  Jesus was going to have to die on a cross.  Jesus told the disciples to eat the bread and remember his body that would be broken for them and drink from the cup and remember the blood that he would shed on the cross.

Cross Egg:  Jesus was crucified on a cross.  The cross is red to show that Jesus bled and died on the cross.  When Jesus died on the cross, he paid the price for our sins by dying in our place.  Jesus never sinned.  He was perfect and took the punishment for all of our sins upon himself so that we could be forgiven.

Tomb Egg:  Jesus’ body was placed in a tomb and it stayed there for 3 days.  On the third day, Jesus rose from the dead!  The stone was rolled away by angels, and when the women came looking for Jesus, the angel said, “He is not here; He has risen!”.  When Jesus rose from the dead it showed that he was who he said he was because he conquered death and that he had the power to forgive us from our sins.

Heaven Egg:  Because of the Easter story, we will be with God in heaven when we die.  Heaven will be a beautiful place filled with joy because we will be with God and see all of his glory!

(You can use your own words, of course, but that is roughly how we explained it last year).

How to involve the kiddos:

1) Ask your child to hand you each shape as you are ready to glue it on.  As you glue it on, explain its meaning.  Repeat this with all 4 eggs.
2) Go over the story again once the eggs are lined up.  Take out your children’s bible (here’s ours), and read the Easter story.  Have the kids point to the eggs being talked about.
3) Before Easter, have your kids tell a friend or relative about the resurrection eggs they made and each of their meanings.
4) On Easter morning, hide the eggs around the house, and have the kids find them and bring them back together before breakfast is served and Easter baskets are invaded.
5) Pray together as a family and thank God for each aspect of the Easter story.
6) Ask your child which egg is their favorite and why.
7) If your child is into hard boiled eggs, allow them to eat that one on Sunday morning as part of breakfast.
Surely you will come up with even more of your own great ideas for the Resurrection Eggs.  I’d love to hear what you do with them if you try them!
Happy (early) Easter to you!

(Sharing HERE)

Did you enjoy today’s snack?  Learn more about this blog here.

Filed Under: biblical, Easter, eggs, holidays Tagged With: Biblical, Easter, Eggs, Holidays

I'm Amy. One of my passions is serving my two little girls healthy, wholesome food in unexpected ways. Lunch time has become a time of learning, imagining, and bonding for us as we use great food to create little works of art... Read More…

facebooktwitterpinterest instagram google+

Tags

animals Apple avocado banana Biblical Birthday Parties blueberries Books Breakfasts carrots Celery cheese Christmas cottage cheese desserts Disney Easter educational Eggs everyday scenes grapes ham history Holidays Lunches movies nature Oatmeal Party Food peanut butter peanut butter sandwich raisin Raspberries Snacks snowman Sports Strawberries super healthy teaching and learning turkey TV shows Valentines Day Weekly Kids Co-op Winter yogurt

Best of

Best Of

Copyright Note

Please feel free to use any of these ideas with your children at home, school, church, or anywhere you are inspired to make fun of lunch. If you would like to share a post on a blog or site, you may use one picture so long as you include a link to the original post. Please do not re-post the whole article or distribute printed-out content without written permission from the original author.

Grab our button!

Creative Kid Snacks Button

© Copyright Creative Kid Snacks · Design & Development by 4th & Market